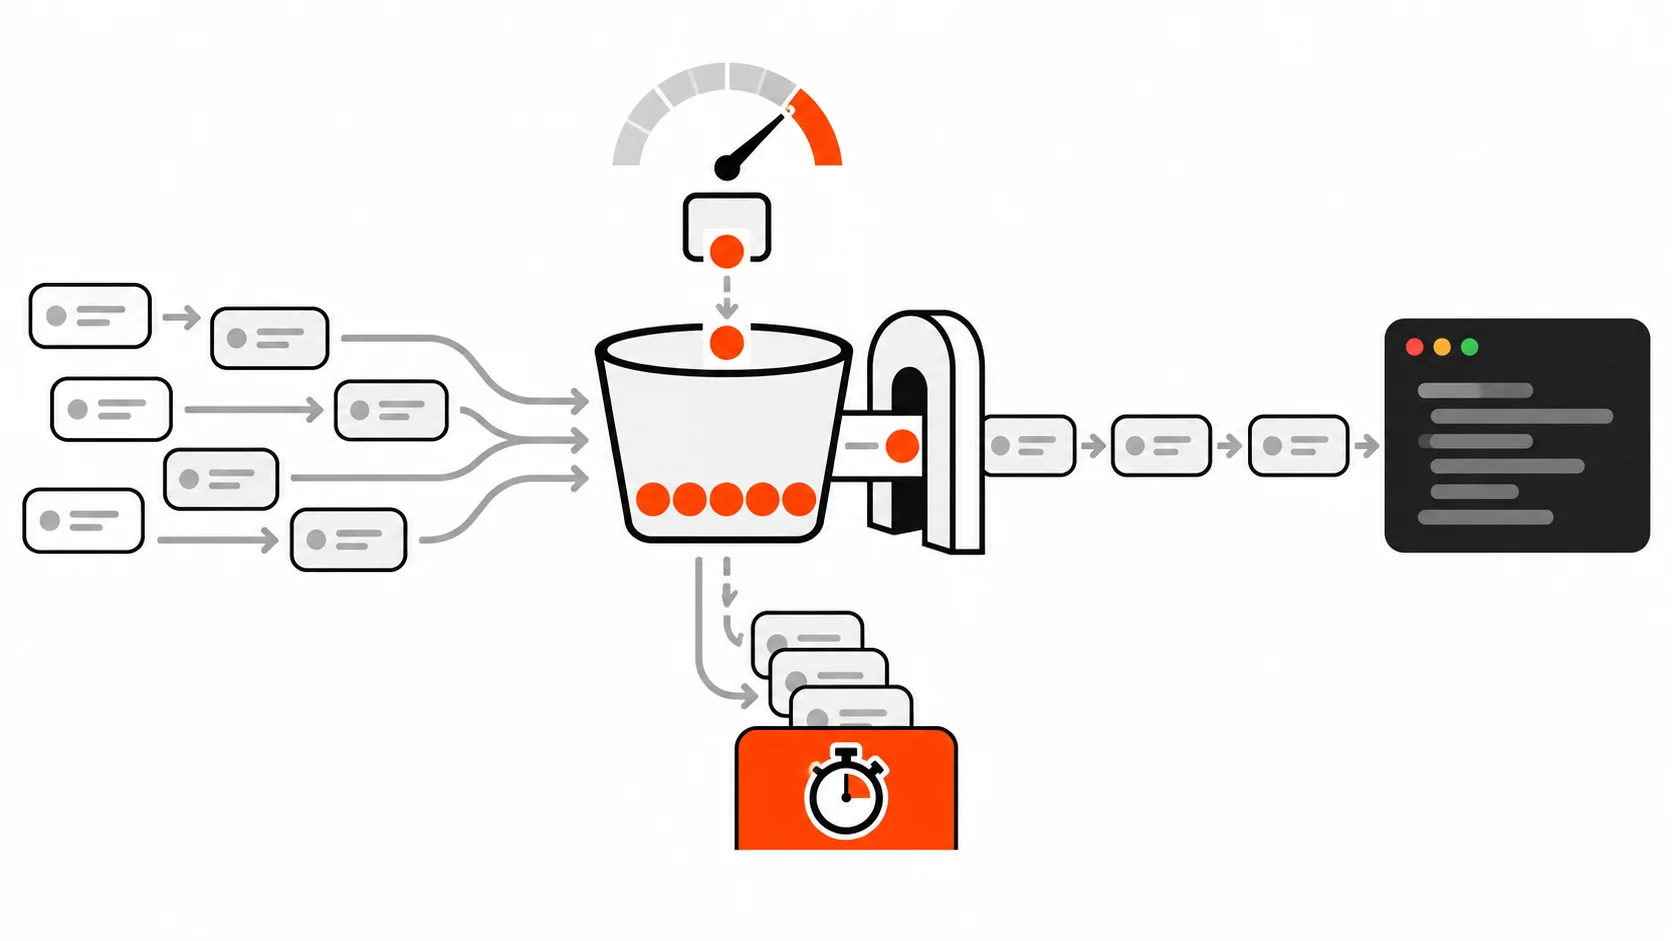
A few months ago a client messaged me at 7 in the morning with a screenshot of their SMS provider dashboard. Overnight, their signup form had sent a little over 4,000 one-time passwords to phone numbers in countries they did not even sell to. Nobody had hacked anything. A bot had simply found the /api/send-otp endpoint and called it as fast as it could, and every call cost real money. The fix took me about forty minutes. The bill took them a lot longer to get over.
That is the boring truth about API rate limiting: it is rarely the exciting part of a project, so it gets skipped, and then one day it is the only part that matters. In this guide I will walk through how I actually add rate limiting on client projects as a freelance developer. We will cover the main algorithms (token bucket, fixed window and sliding window) and when each one makes sense, how to choose what you limit by, how I design Redis keys, which response headers to send with a 429, working code for Next.js route handlers and Express, notes for WordPress REST endpoints, how clients should back off, and the mistakes that lock out real users while the bots carry on.
What rate limiting is, and why APIs die without it
Rate limiting means deciding how many requests a given caller may make in a given amount of time, and rejecting the rest with a clear answer. That is it. The interesting work is in the details: who counts as a caller, what the time window looks like, how bursts are handled, and what you tell the client when you say no.
Without it, every public endpoint is an open invitation. The obvious threat is a flood of traffic that takes the server down, but in my experience the more common damage is quieter. Credential stuffing bots try thousands of leaked passwords against a login route. Scrapers pull a product catalogue page by page through a search endpoint that runs an expensive database query each time. A buggy mobile app release retries a failing request in a tight loop and turns a thousand users into a self-inflicted denial of service. Paid third-party calls, like SMS, email, AI completions or maps lookups, quietly run up a bill. None of these need a botnet. One script on one laptop is enough.
Rate limiting is not a replacement for authentication, input validation or a proper web application firewall. Think of it as a seatbelt. It does not stop the crash from happening, but it turns a disaster into an annoyance, and it buys you time to notice and respond.
Token bucket vs fixed window vs sliding window
There are many rate limiting algorithms, but three cover almost every project I work on. The right choice depends on whether you care more about simplicity, accuracy at the window edges, or allowing natural bursts.
Fixed window
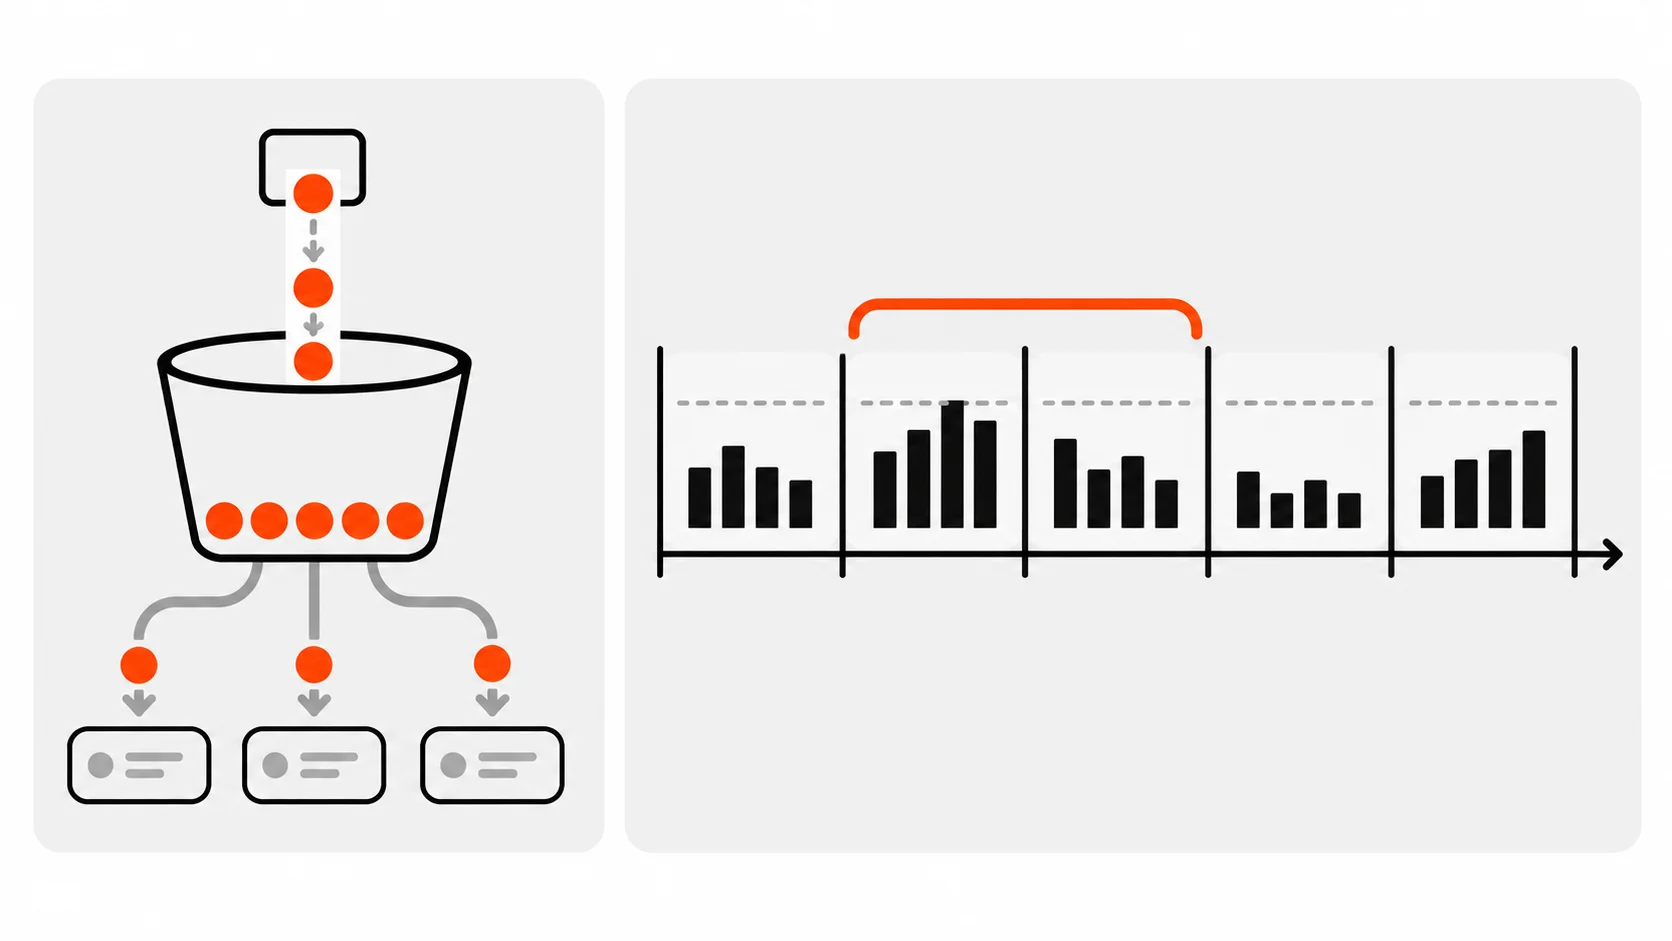
A fixed window counts requests in clock-aligned buckets, for example per minute. Every request increments a counter for the current minute, and once the counter passes the limit, the rest of that minute is rejected. When the clock rolls over, the counter starts again from zero.
It is the simplest thing that works, and in Redis it is just an INCR plus an EXPIRE. The weakness is the boundary. With a limit of 100 per minute, a client can send 100 requests at 12:00:59 and another 100 at 12:01:00, which is 200 requests in two seconds. For a login form that is usually fine. For an endpoint protecting an expensive downstream call, it might not be.
// Fixed window: 100 requests per minute per caller
async function fixedWindow(redis, id, limit = 100, windowSec = 60) {
  const windowId = Math.floor(Date.now() / 1000 / windowSec);
  const key = `rl:fw:${id}:${windowId}`;
  const count = await redis.incr(key);
  if (count === 1) await redis.expire(key, windowSec);
  return { allowed: count <= limit, remaining: Math.max(0, limit - count) };
}
Sliding window
A sliding window looks back over the last N seconds from right now, rather than from the top of the minute, so the boundary burst disappears. There are two common versions. A sliding log stores a timestamp for every request (a Redis sorted set works well) and counts the entries inside the window. It is exact, but memory grows with the limit, so I only use it for small limits like five login attempts per ten minutes.
The sliding window counter is the cheaper approximation. It keeps the current and previous fixed window counts and weights the previous one by how much of it still overlaps the sliding window. If you are 30 percent into the current minute, the estimate is the current count plus 70 percent of the previous count. It is not perfectly exact, but it is close enough for nearly every API and costs only two small counters per caller.
Token bucket
A token bucket is my default for general API traffic. Each caller has a bucket that holds up to a set number of tokens, the capacity, and the bucket refills at a steady rate, for example 2 tokens per second. Each request takes a token. If the bucket is empty, the request is rejected until it refills.
What I like about it is that it matches how real clients behave. A dashboard page load might fire eight requests at once, then nothing for twenty seconds. A token bucket with a capacity of 20 and a refill rate of 2 per second lets that burst through instantly, while still capping sustained traffic at 120 requests a minute. It also lets you charge different costs per request: a cheap read takes one token, an export or a search with heavy filters takes five.
My rough rule: token bucket for general authenticated API traffic, a sliding log for tiny security-sensitive limits like logins, password resets and OTP sends, and a fixed window when I need something quick and the boundary burst genuinely does not matter.
Per-IP vs per-API-key vs per-user limits
Choosing the algorithm is the easy part. Choosing what you count by, the identity of the caller, is where most rate limiters go wrong, because it decides who gets punished when the limit is hit.
Per-IP limits are the only option for anonymous traffic, so I always use them on login, signup, contact forms and public search. But IP addresses are a terrible proxy for a person. An entire office often shares one public IP. So do university networks, hotel Wi-Fi and millions of mobile users behind carrier-grade NAT. Meanwhile, one attacker with IPv6 can rotate through a huge number of addresses inside a single allocation. For IPv6 I limit by the /64 prefix instead of the full address, because that is what a single customer usually gets.
Per-API-key limits are right for machine-to-machine traffic and public developer APIs. The key identifies the customer, it maps naturally to pricing tiers, and it does not care how many servers or IPs the customer runs. Hash the key before you put it into a Redis key name, so a dump of your Redis instance never leaks live credentials.
Per-user limits are what I use once someone is logged in. The user ID is stable, it follows them across devices and networks, and it means forty colleagues in one office each get their own budget instead of sharing one. In practice I layer them: anonymous requests are limited by IP, authenticated requests by user or API key, and a much higher per-IP ceiling sits on top of everything to catch account-rotation abuse.
One more layer worth having is per route. A single global budget per user treats a cheap profile read the same as an expensive PDF export. I give each sensitive or expensive route its own small budget, and leave a generous general budget for everything else.
Redis key design that stays readable
If your app runs on more than one process, which includes every serverless deployment, an in-memory counter is not a rate limiter. Each instance keeps its own count, so ten instances quietly give every caller ten times the limit. You need a shared store, and Redis is the usual choice because its operations are atomic and fast and keys can expire on their own.
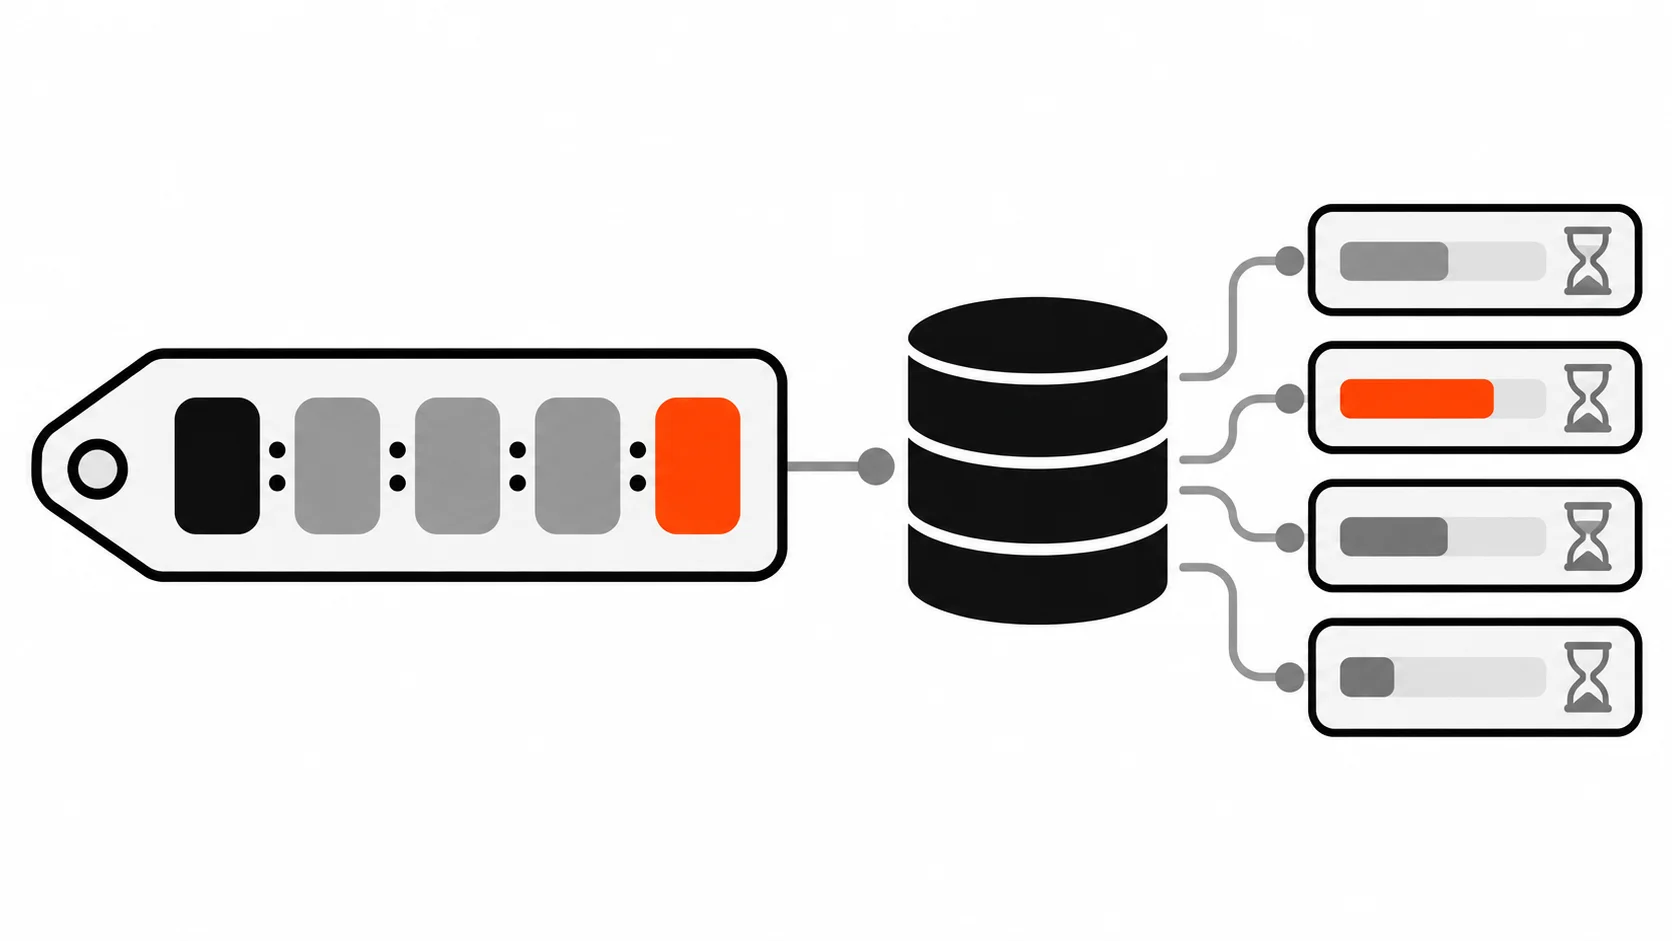
I keep keys predictable so I can debug them at two in the morning with redis-cli. The pattern I use is prefix, algorithm, route, identity type, identity:
rl:tb:api:user:8421               # token bucket, general API, user 8421
rl:tb:search:key:3f9a1c...        # token bucket, search route, hashed API key
rl:sl:login:ip:203.0.113.24       # sliding log, login route, IPv4 address
rl:sl:login:ip6:2001:db8:12:34    # sliding log, login route, IPv6 /64 prefix
rl:fw:otp:phone:5c1e9b...:2905113 # fixed window, OTP route, hashed phone, window id
Three rules keep this tidy. Every key has a TTL, so callers who disappear do not leave data behind forever. Personal data like phone numbers, emails and API keys is hashed before it goes into the key. And the route is part of the key, so tightening the login limit never affects the general API budget.
The other important detail is atomicity. If you read the count, decide in Node, and then write it back, two requests arriving at the same moment can both read the old value and both get through. The clean fix is a small Lua script that Redis runs as a single atomic operation. Here is the token bucket I use:
-- token-bucket.lua
-- KEYS[1] = bucket key
-- ARGV[1] = capacity, ARGV[2] = refill tokens per second, ARGV[3] = cost
local capacity = tonumber(ARGV[1])
local rate = tonumber(ARGV[2])
local cost = tonumber(ARGV[3])

-- Use the Redis clock, not the app server clock, to avoid clock skew
local t = redis.call('TIME')
local now = tonumber(t[1]) * 1000 + math.floor(tonumber(t[2]) / 1000)

local data = redis.call('HMGET', KEYS[1], 'tokens', 'ts')
local tokens = tonumber(data[1]) or capacity
local ts = tonumber(data[2]) or now

local elapsed = math.max(0, now - ts) / 1000
tokens = math.min(capacity, tokens + elapsed * rate)

local allowed = 0
local retry_after = 0
if tokens >= cost then
  tokens = tokens - cost
  allowed = 1
else
  retry_after = math.ceil((cost - tokens) / rate)
end

redis.call('HSET', KEYS[1], 'tokens', tokens, 'ts', now)
redis.call('PEXPIRE', KEYS[1], math.ceil(capacity / rate * 1000) + 1000)

return { allowed, math.floor(tokens), retry_after }
Notice that the script asks Redis for the time instead of trusting a timestamp passed in from the app. That one line removes a whole class of bugs when your app servers disagree about the time by a second or two.
Returning 429, Retry-After and RateLimit headers
When you reject a request, say so properly. The status code is 429 Too Many Requests. Not 403, which tells the client it is forbidden forever, and not 500, which makes your monitoring think the server is broken and makes clients retry immediately.
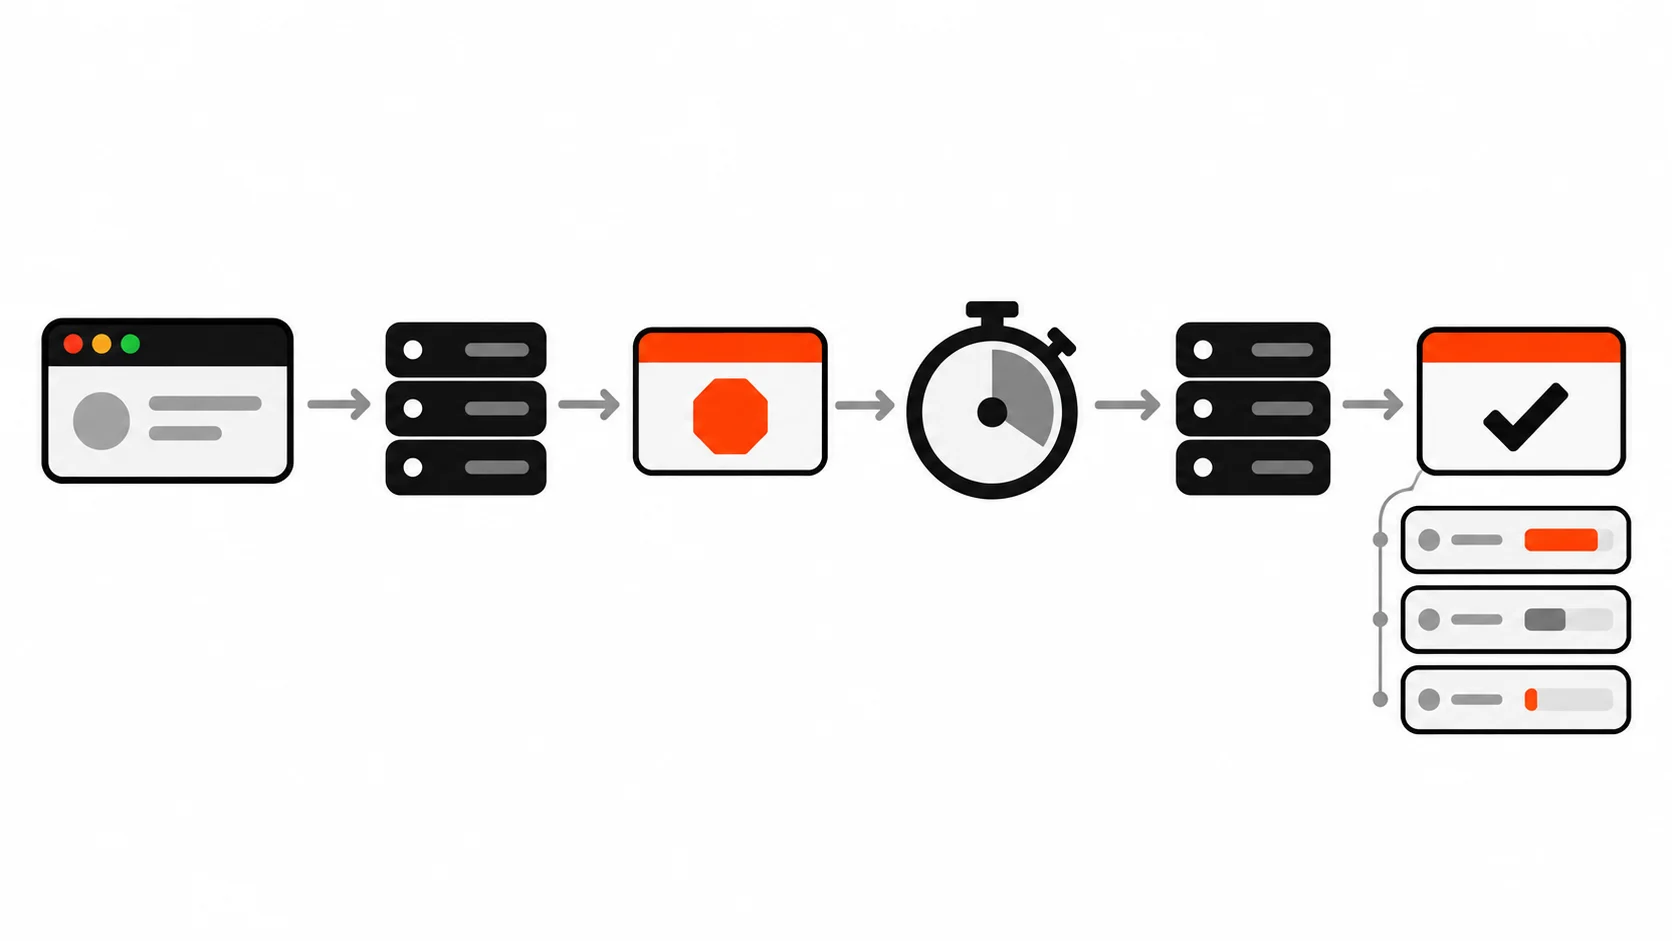
The most useful header you can add is Retry-After, either as a number of seconds or as an HTTP date. It turns a guessing game into an instruction. Well-behaved clients, SDKs and many HTTP libraries will honour it, and it stops them hammering you with instant retries.
I also send rate limit headers on every response, not just on rejections, so clients can slow down before they hit the wall. The IETF has been standardising these in the RateLimit header fields draft. Earlier versions of the draft used separate RateLimit-Limit, RateLimit-Remaining and RateLimit-Reset headers, and that form is still widely understood. Newer versions combine them into structured RateLimit and RateLimit-Policy fields. Plenty of large APIs still use the older X-RateLimit-* names. Whichever you pick, document it and be consistent.
HTTP/1.1 429 Too Many Requests
Content-Type: application/json
Retry-After: 12
RateLimit-Limit: 20
RateLimit-Remaining: 0
RateLimit-Reset: 12

{"error":"rate_limited","message":"Too many requests. Try again in 12 seconds."}
Keep the body short and human. A developer reading their logs should immediately understand what happened and how long to wait.
A working example: Next.js route handler and Express
Here is the shared helper. It loads the Lua script into ioredis once with defineCommand, works out a caller identity, and returns everything the route needs to build its response headers.
// lib/rate-limit.ts
import Redis from 'ioredis';
import { createHash } from 'node:crypto';
import { readFileSync } from 'node:fs';
import path from 'node:path';

const redis = new Redis(process.env.REDIS_URL!);

redis.defineCommand('takeToken', {
  numberOfKeys: 1,
  lua: readFileSync(path.join(process.cwd(), 'lib/token-bucket.lua'), 'utf8'),
});

const hash = (v: string) => createHash('sha256').update(v).digest('hex').slice(0, 24);

export type Limit = { capacity: number; refillPerSec: number; cost?: number };

export async function takeToken(route: string, identity: string, limit: Limit) {
  const key = `rl:tb:${route}:${identity}`;
  const [allowed, remaining, retryAfter] = (await (redis as any).takeToken(
    key, limit.capacity, limit.refillPerSec, limit.cost ?? 1
  )) as [number, number, number];
  return { allowed: allowed === 1, remaining, retryAfter, limit: limit.capacity };
}

export function identify(opts: { userId?: string; apiKey?: string | null; ip: string }) {
  if (opts.userId) return `user:${opts.userId}`;
  if (opts.apiKey) return `key:${hash(opts.apiKey)}`;
  return `ip:${opts.ip}`;
}
And the route handler in the App Router. Route handlers run on the Node.js runtime by default, which ioredis needs. If you move a handler to the Edge runtime, switch to an HTTP-based Redis client instead.
// app/api/search/route.ts
import { NextRequest, NextResponse } from 'next/server';
import { takeToken, identify } from '@/lib/rate-limit';
import { getSession } from '@/lib/auth';

export async function GET(req: NextRequest) {
  const session = await getSession(req);
  // Only trust a forwarding header that your own platform or proxy sets
  const ip = req.headers.get('x-forwarded-for')?.split(',')[0]?.trim() ?? 'unknown';
  const id = identify({ userId: session?.userId, apiKey: req.headers.get('x-api-key'), ip });

  const rl = await takeToken('search', id, { capacity: 20, refillPerSec: 0.5 });
  const headers = {
    'RateLimit-Limit': String(rl.limit),
    'RateLimit-Remaining': String(rl.remaining),
  };

  if (!rl.allowed) {
    return NextResponse.json(
      { error: 'rate_limited', message: `Too many searches. Try again in ${rl.retryAfter} seconds.` },
      { status: 429, headers: { ...headers, 'Retry-After': String(rl.retryAfter) } }
    );
  }

  const results = await runSearch(req.nextUrl.searchParams.get('q') ?? '');
  return NextResponse.json(results, { headers });
}
The limiter runs before the expensive search query, which is the whole point. A limiter that runs after the database work protects nothing.
On Express, the same helper drops into a small middleware. The line people forget is trust proxy. Behind a load balancer or a platform proxy, req.ip is the proxy’s address unless you tell Express how many hops to trust, and then every visitor shares one bucket.
// server.ts
import express from 'express';
import { takeToken, identify, type Limit } from './lib/rate-limit';

const app = express();
app.set('trust proxy', 1); // exactly one trusted proxy in front of the app

const limit = (route: string, cfg: Limit) =>
  async (req: any, res: any, next: any) => {
    const id = identify({ userId: req.user?.id, apiKey: req.get('x-api-key'), ip: req.ip });
    const rl = await takeToken(route, id, cfg);
    res.set('RateLimit-Limit', String(rl.limit));
    res.set('RateLimit-Remaining', String(rl.remaining));
    if (!rl.allowed) {
      res.set('Retry-After', String(rl.retryAfter));
      return res.status(429).json({ error: 'rate_limited', retryAfter: rl.retryAfter });
    }
    next();
  };

app.post('/api/send-otp', limit('otp', { capacity: 3, refillPerSec: 1 / 300 }), sendOtp);
app.use('/api', limit('api', { capacity: 60, refillPerSec: 1 }));
That OTP limit allows three codes, then one more every five minutes. It is the exact change that would have saved my client their 4,000 text messages. If you would rather not write your own middleware, express-rate-limit with a Redis store is a solid, well-maintained option, and the same advice about trust proxy and key choice applies.
Rate limiting WordPress REST and custom endpoints
WordPress core does not rate limit the REST API, so anything under /wp-json/ is open to as many requests as your server can take. On headless WordPress builds, where a React or Next.js front end talks to WordPress, I treat this seriously, especially for custom endpoints like contact forms, quote requests and newsletter signups.
My first choice is to limit at the edge, before PHP even starts. A Cloudflare rate limiting rule on /wp-json/dp/v1/contact, or an Nginx limit_req zone, is cheaper than anything you can do inside WordPress. When I need logic that only the app knows about, such as different limits for logged-in users, I hook rest_pre_dispatch, which runs before the endpoint callback and lets me short-circuit with a 429:
add_filter( 'rest_pre_dispatch', function ( $result, $server, $request ) {
    if ( null !== $result || 0 !== strpos( $request->get_route(), '/dp/v1/contact' ) ) {
        return $result;
    }

    $ip     = $_SERVER['REMOTE_ADDR'] ?? 'unknown';
    $window = 600; // 10 minutes
    $limit  = 5;
    $key    = 'contact_' . md5( $ip ) . '_' . (int) floor( time() / $window );

    wp_cache_add( $key, 0, 'dp_rate_limit', $window );
    $count = wp_cache_incr( $key, 1, 'dp_rate_limit' );

    if ( false !== $count && $count > $limit ) {
        $response = new WP_REST_Response(
            array( 'code' => 'rate_limited', 'message' => 'Too many requests. Please try again later.' ),
            429
        );
        $response->header( 'Retry-After', (string) ( $window - ( time() % $window ) ) );
        return $response;
    }

    return $result;
}, 10, 3 );
Two warnings from real projects. First, wp_cache_incr is only shared between requests when the site has a persistent object cache such as Redis or Memcached. Without one, the cache lives for a single request and this code silently does nothing. Transients work as a fallback, but they write to the database and are not atomic, so use them only for low-traffic forms. Second, behind Cloudflare or a reverse proxy, REMOTE_ADDR is the proxy’s address. Restore the real visitor IP at the server level so you are not limiting all of Cloudflare as one user.
Client-side backoff: be a good citizen
Rate limiting is a conversation, and the client has to hold up its end. When I build front ends or integrations that call someone else’s API, I follow three rules: respect Retry-After when it is present, use exponential backoff with jitter when it is not, and give up after a few attempts instead of retrying forever.
async function fetchWithBackoff(url: string, init: RequestInit = {}, maxRetries = 4) {
  for (let attempt = 0; ; attempt++) {
    const res = await fetch(url, init);
    if ((res.status !== 429 && res.status !== 503) || attempt >= maxRetries) return res;

    const header = res.headers.get('retry-after');
    let waitMs = 2 ** attempt * 500; // 0.5s, 1s, 2s, 4s
    if (header) {
      const seconds = Number(header);
      const date = Date.parse(header);
      if (Number.isFinite(seconds) && seconds > 0) waitMs = seconds * 1000;
      else if (!Number.isNaN(date)) waitMs = Math.max(0, date - Date.now());
    }
    const jitter = Math.random() * waitMs * 0.3;
    await new Promise((r) => setTimeout(r, waitMs + jitter));
  }
}
Jitter matters more than people expect. If a hundred clients all hit the limit at the same moment and all wait exactly two seconds, they all come back at the same moment too. A little randomness spreads them out. Only retry requests that are safe to repeat, or that carry an idempotency key, so a retried payment or order never runs twice.
Common rate limiting mistakes that lock out real users
These are the problems I find most often when I review an existing setup. Almost all of them hurt legitimate users more than attackers.
- One global counter. I have seen a limiter keyed on the route alone, so one bot used up the budget and every real user got 429s. Always include a caller identity in the key.
- Per-IP limits on logged-in traffic. A whole office, school or mobile network can share one IP. Once a user is authenticated, count by user ID or API key instead.
- No allowlist for webhooks and monitors. Payment providers and other webhook senders deliver in bursts, especially when they replay a backlog after an outage. If you rate limit them, they retry, and you get more traffic, not less. Verify the webhook signature, then skip or raise the limit for that route. Do the same for your own uptime monitors and health checks.
- Clock skew between servers. If each app server computes window ids or refill time from its own clock, servers a second apart disagree about the state of the same bucket. Use the Redis TIME command inside the script, as in the token bucket above.
- In-memory limiters on serverless or multiple instances. Each instance counts on its own, so the real limit is your limit multiplied by the number of instances. Use a shared store.
- Limiting after the expensive work. If the database query or the paid API call has already happened, the 429 saved nothing. Put the limiter first.
- No Retry-After header. Clients guess, usually badly, and retry immediately. Tell them exactly when to come back.
- Failing closed when Redis is down. If the limiter cannot reach Redis and blocks everything, your rate limiter just became your outage. For most routes I fail open and log loudly, and only fail closed on high-risk routes like OTP sends.
My rate limiting checklist
This is the list I run through before an API goes live on a client project:
- Every public and authenticated route sits behind a limiter, with tighter budgets for login, signup, password reset, OTP, contact forms, search and exports.
- Anonymous traffic is keyed by IP (by /64 for IPv6), authenticated traffic by user ID or hashed API key.
- Counters live in Redis or another shared store, updated atomically with a Lua script or a single atomic command.
- Keys follow a readable pattern, have a TTL and never contain raw personal data or credentials.
- Rejections return 429 with Retry-After and a short JSON body, and normal responses include rate limit headers.
- The trusted proxy and real client IP are configured correctly, and webhook senders and monitors are allowlisted.
- The limiter runs before any expensive work, and the fail-open or fail-closed behaviour is a deliberate choice per route.
- 429s are logged and graphed, so a spike tells you about an attack or a broken client before your users do.
Final thoughts
Good API rate limiting is invisible to real users and painful for abusers. The algorithm matters less than people think. What matters is counting the right identity, sharing state across instances, rejecting early, and telling clients clearly when to come back. Start with a token bucket per user, a strict sliding log on login and OTP routes, and proper 429 responses. That covers most projects, and it is a one-afternoon job that can save a very expensive morning.
If you want help adding rate limiting to your Node.js API, Next.js app or WordPress site, get in touch with me and tell me about your project.