Category: APIs, Backend & Security

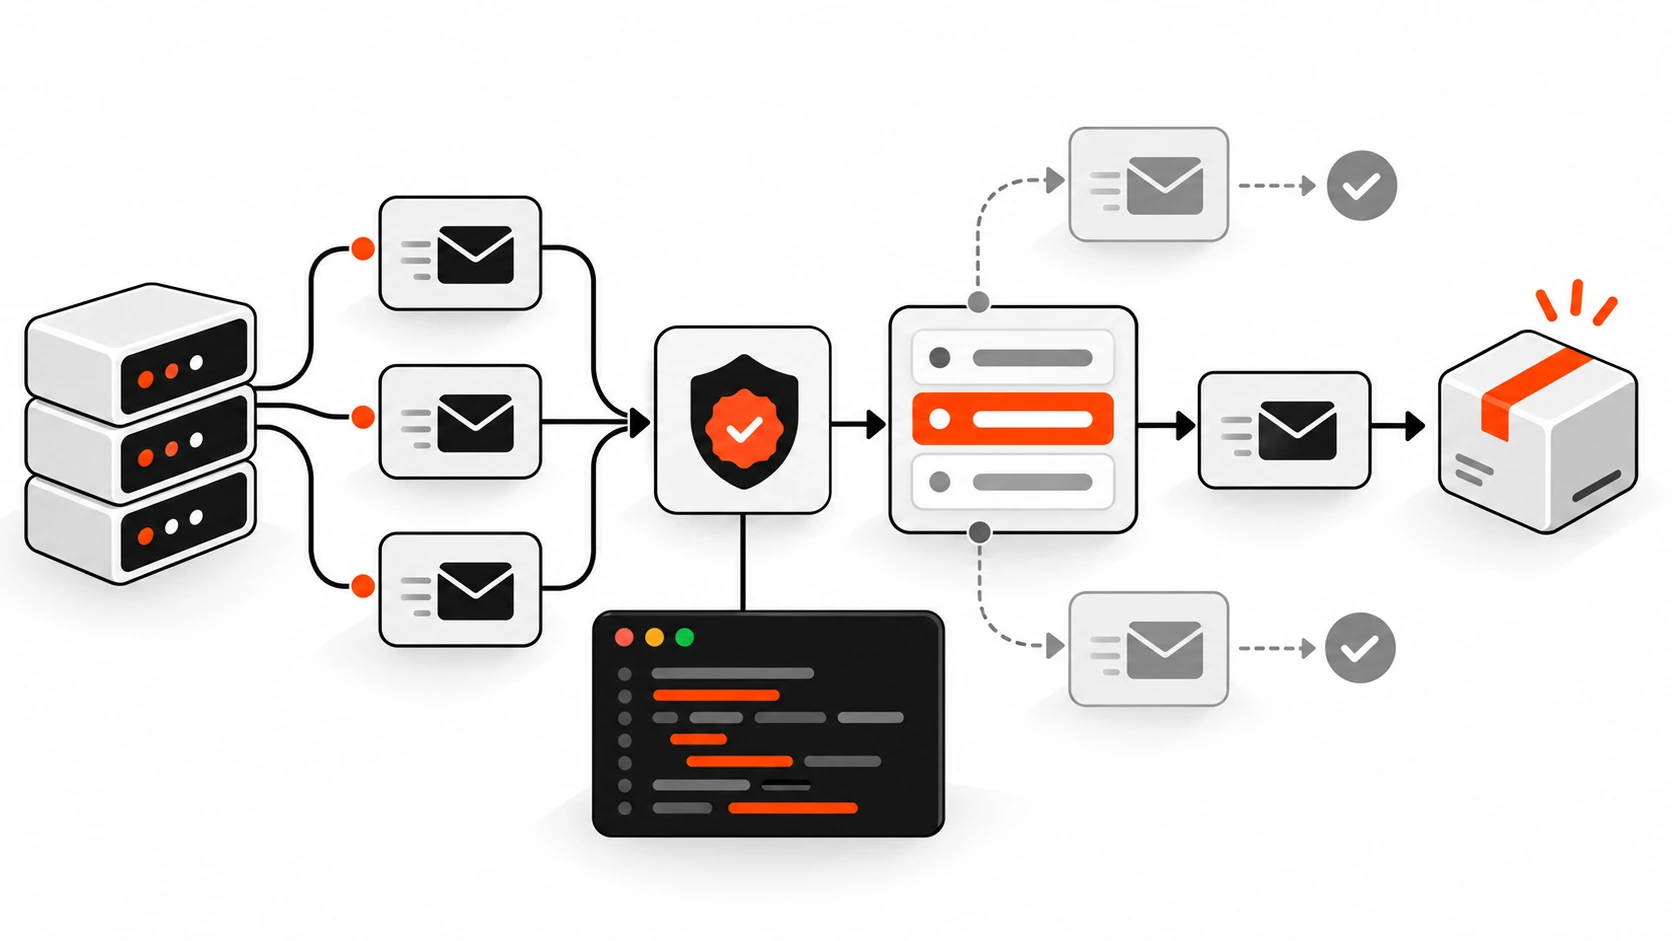
API design, backend reliability and web security: rate limiting, idempotency, webhooks and Content Security Policy.

  • API Rate Limiting Done Right: Protect Your Backend Without Locking Out Real Users

    API Rate Limiting Done Right: Protect Your Backend Without Locking Out Real Users

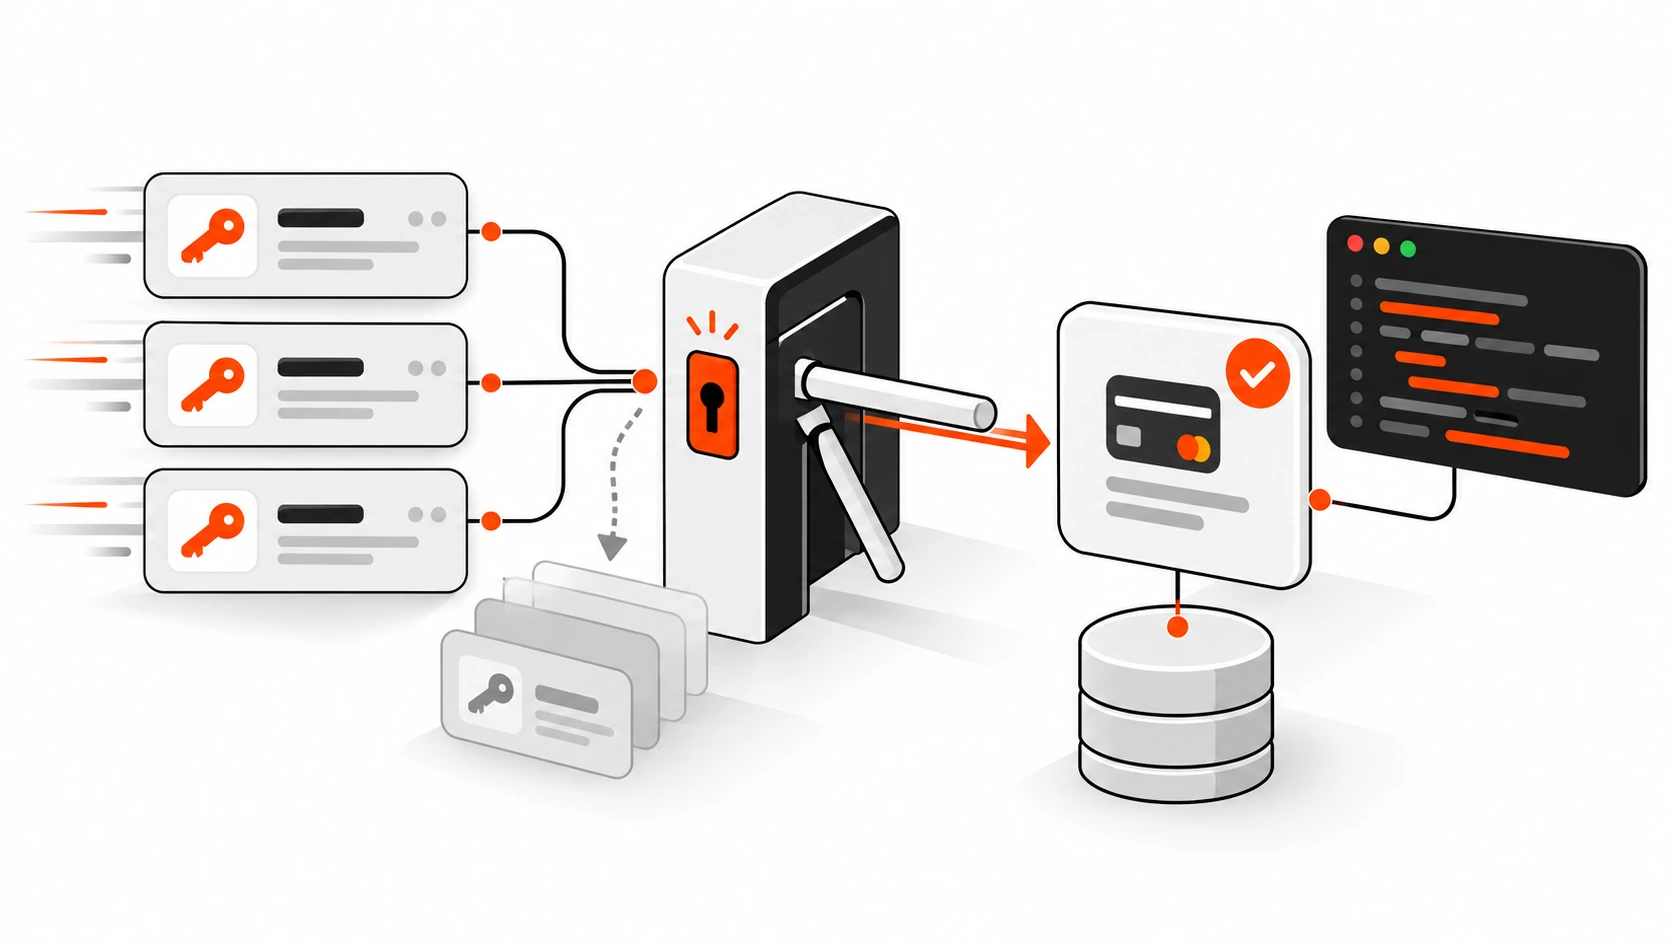
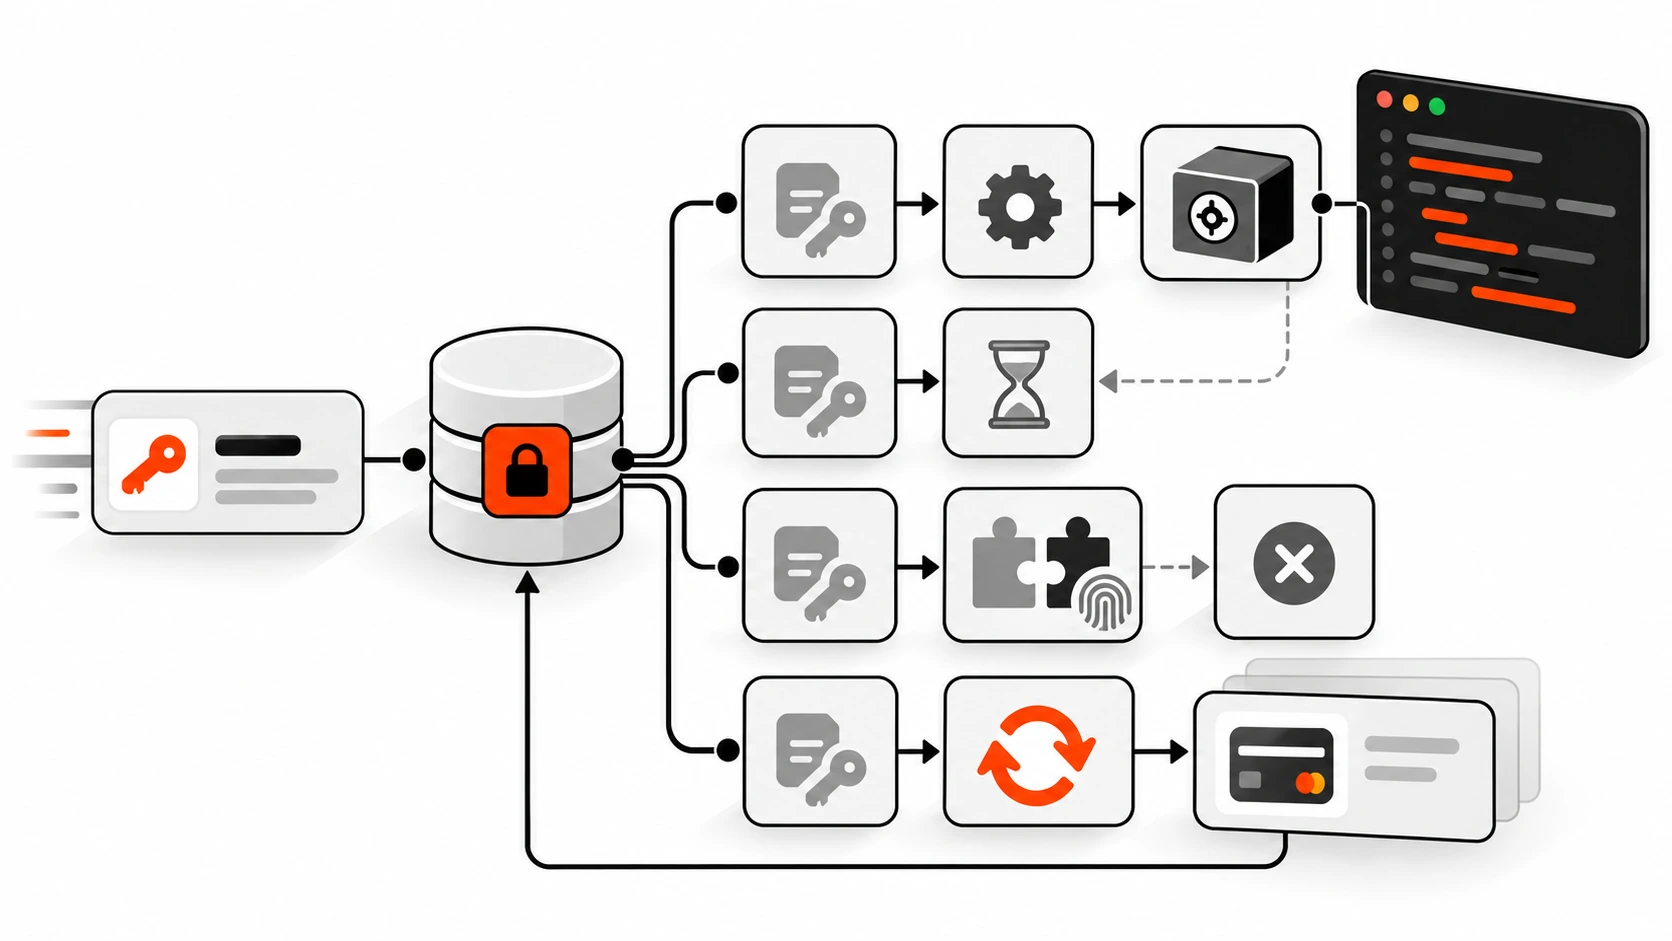
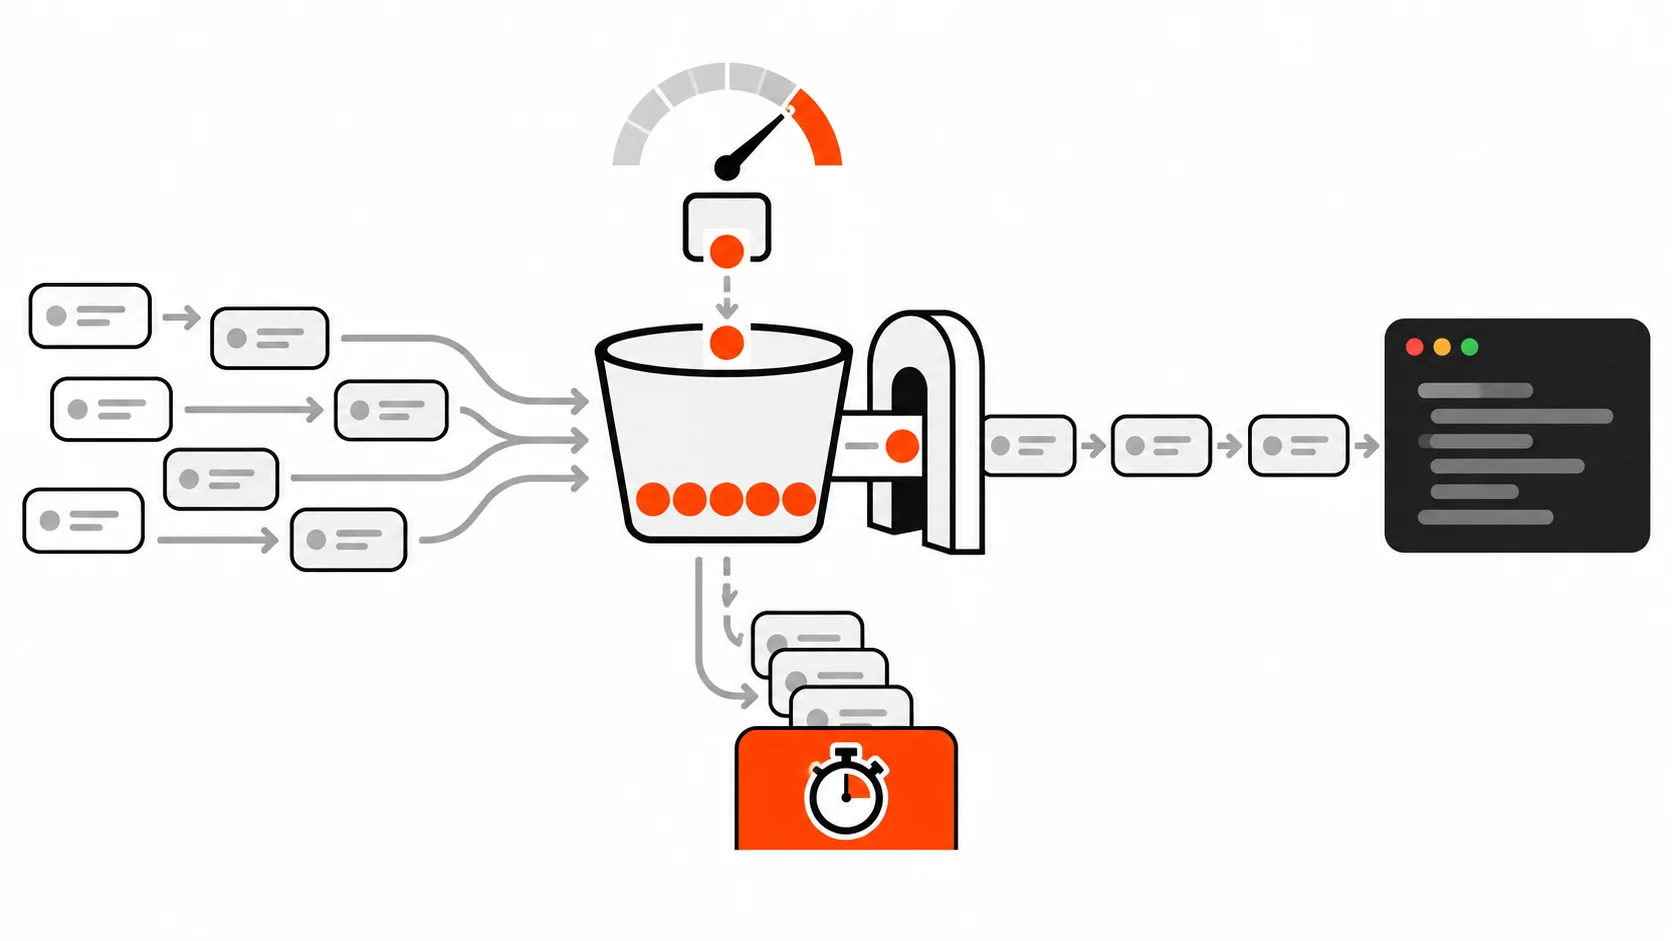
    Flat vector illustration of an API gateway with a token bucket letting request cards through while excess requests are held back by an orange-red barrier
    API rate limiting: let real traffic through, hold back the flood.

    A few months ago a client messaged me at 7 in the morning with a screenshot of their SMS provider dashboard. Overnight, their signup form had sent a little over 4,000 one-time passwords to phone numbers in countries they did not even sell to. Nobody had hacked anything. A bot had simply found the /api/send-otp endpoint and called it as fast as it could, and every call cost real money. The fix took me about forty minutes. The bill took them a lot longer to get over.

    That is the boring truth about API rate limiting: it is rarely the exciting part of a project, so it gets skipped, and then one day it is the only part that matters. In this guide I will walk through how I actually add rate limiting on client projects as a freelance developer. We will cover the main algorithms (token bucket, fixed window and sliding window) and when each one makes sense, how to choose what you limit by, how I design Redis keys, which response headers to send with a 429, working code for Next.js route handlers and Express, notes for WordPress REST endpoints, how clients should back off, and the mistakes that lock out real users while the bots carry on.

    What rate limiting is, and why APIs die without it

    Rate limiting means deciding how many requests a given caller may make in a given amount of time, and rejecting the rest with a clear answer. That is it. The interesting work is in the details: who counts as a caller, what the time window looks like, how bursts are handled, and what you tell the client when you say no.

    Without it, every public endpoint is an open invitation. The obvious threat is a flood of traffic that takes the server down, but in my experience the more common damage is quieter. Credential stuffing bots try thousands of leaked passwords against a login route. Scrapers pull a product catalogue page by page through a search endpoint that runs an expensive database query each time. A buggy mobile app release retries a failing request in a tight loop and turns a thousand users into a self-inflicted denial of service. Paid third-party calls, like SMS, email, AI completions or maps lookups, quietly run up a bill. None of these need a botnet. One script on one laptop is enough.

    Rate limiting is not a replacement for authentication, input validation or a proper web application firewall. Think of it as a seatbelt. It does not stop the crash from happening, but it turns a disaster into an annoyance, and it buys you time to notice and respond.

    Token bucket vs fixed window vs sliding window

    There are many rate limiting algorithms, but three cover almost every project I work on. The right choice depends on whether you care more about simplicity, accuracy at the window edges, or allowing natural bursts.
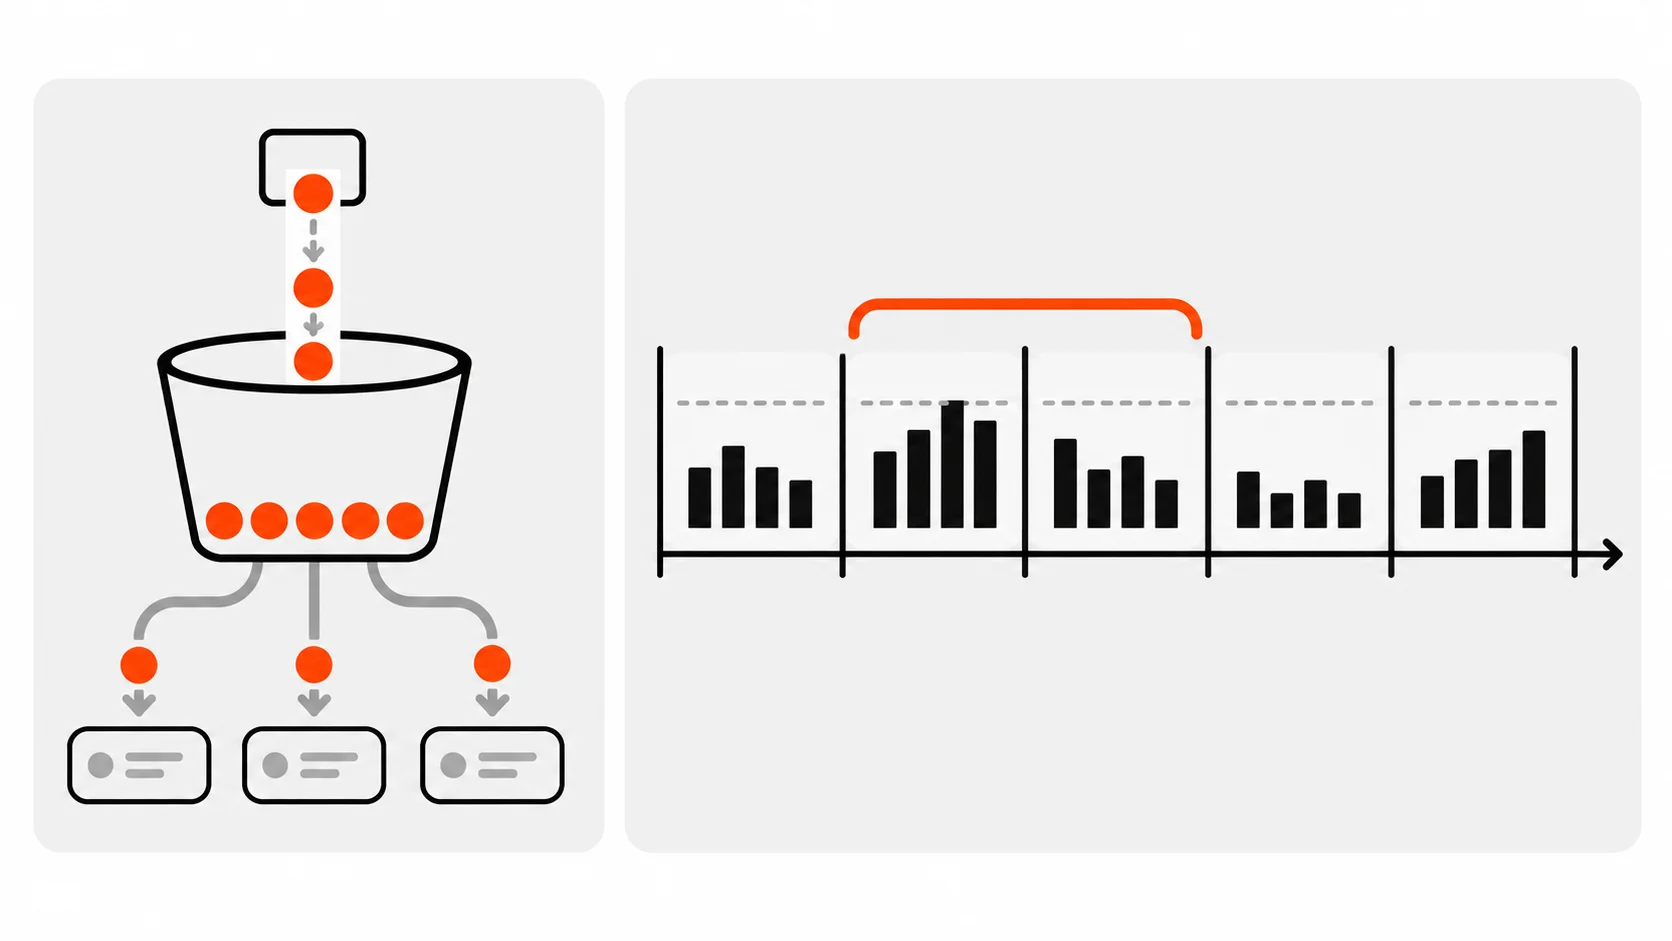
    Comparison diagram of a token bucket refilling with tokens next to a timeline split into fixed windows and a sliding window bracket
    Token bucket refills steadily and allows short bursts; fixed windows reset on the clock; sliding windows smooth out the edges.

    Fixed window

    A fixed window counts requests in clock-aligned buckets, for example per minute. Every request increments a counter for the current minute, and once the counter passes the limit, the rest of that minute is rejected. When the clock rolls over, the counter starts again from zero.

    It is the simplest thing that works, and in Redis it is just an INCR plus an EXPIRE. The weakness is the boundary. With a limit of 100 per minute, a client can send 100 requests at 12:00:59 and another 100 at 12:01:00, which is 200 requests in two seconds. For a login form that is usually fine. For an endpoint protecting an expensive downstream call, it might not be.

    // Fixed window: 100 requests per minute per caller
    async function fixedWindow(redis, id, limit = 100, windowSec = 60) {
      const windowId = Math.floor(Date.now() / 1000 / windowSec);
      const key = `rl:fw:${id}:${windowId}`;
      const count = await redis.incr(key);
      if (count === 1) await redis.expire(key, windowSec);
      return { allowed: count <= limit, remaining: Math.max(0, limit - count) };
    }

    Sliding window

    A sliding window looks back over the last N seconds from right now, rather than from the top of the minute, so the boundary burst disappears. There are two common versions. A sliding log stores a timestamp for every request (a Redis sorted set works well) and counts the entries inside the window. It is exact, but memory grows with the limit, so I only use it for small limits like five login attempts per ten minutes.

    The sliding window counter is the cheaper approximation. It keeps the current and previous fixed window counts and weights the previous one by how much of it still overlaps the sliding window. If you are 30 percent into the current minute, the estimate is the current count plus 70 percent of the previous count. It is not perfectly exact, but it is close enough for nearly every API and costs only two small counters per caller.

    Token bucket

    A token bucket is my default for general API traffic. Each caller has a bucket that holds up to a set number of tokens, the capacity, and the bucket refills at a steady rate, for example 2 tokens per second. Each request takes a token. If the bucket is empty, the request is rejected until it refills.

    What I like about it is that it matches how real clients behave. A dashboard page load might fire eight requests at once, then nothing for twenty seconds. A token bucket with a capacity of 20 and a refill rate of 2 per second lets that burst through instantly, while still capping sustained traffic at 120 requests a minute. It also lets you charge different costs per request: a cheap read takes one token, an export or a search with heavy filters takes five.

    My rough rule: token bucket for general authenticated API traffic, a sliding log for tiny security-sensitive limits like logins, password resets and OTP sends, and a fixed window when I need something quick and the boundary burst genuinely does not matter.

    Per-IP vs per-API-key vs per-user limits

    Choosing the algorithm is the easy part. Choosing what you count by, the identity of the caller, is where most rate limiters go wrong, because it decides who gets punished when the limit is hit.

    Per-IP limits are the only option for anonymous traffic, so I always use them on login, signup, contact forms and public search. But IP addresses are a terrible proxy for a person. An entire office often shares one public IP. So do university networks, hotel Wi-Fi and millions of mobile users behind carrier-grade NAT. Meanwhile, one attacker with IPv6 can rotate through a huge number of addresses inside a single allocation. For IPv6 I limit by the /64 prefix instead of the full address, because that is what a single customer usually gets.

    Per-API-key limits are right for machine-to-machine traffic and public developer APIs. The key identifies the customer, it maps naturally to pricing tiers, and it does not care how many servers or IPs the customer runs. Hash the key before you put it into a Redis key name, so a dump of your Redis instance never leaks live credentials.

    Per-user limits are what I use once someone is logged in. The user ID is stable, it follows them across devices and networks, and it means forty colleagues in one office each get their own budget instead of sharing one. In practice I layer them: anonymous requests are limited by IP, authenticated requests by user or API key, and a much higher per-IP ceiling sits on top of everything to catch account-rotation abuse.

    One more layer worth having is per route. A single global budget per user treats a cheap profile read the same as an expensive PDF export. I give each sensitive or expensive route its own small budget, and leave a generous general budget for everything else.

    Redis key design that stays readable

    If your app runs on more than one process, which includes every serverless deployment, an in-memory counter is not a rate limiter. Each instance keeps its own count, so ten instances quietly give every caller ten times the limit. You need a shared store, and Redis is the usual choice because its operations are atomic and fast and keys can expire on their own.
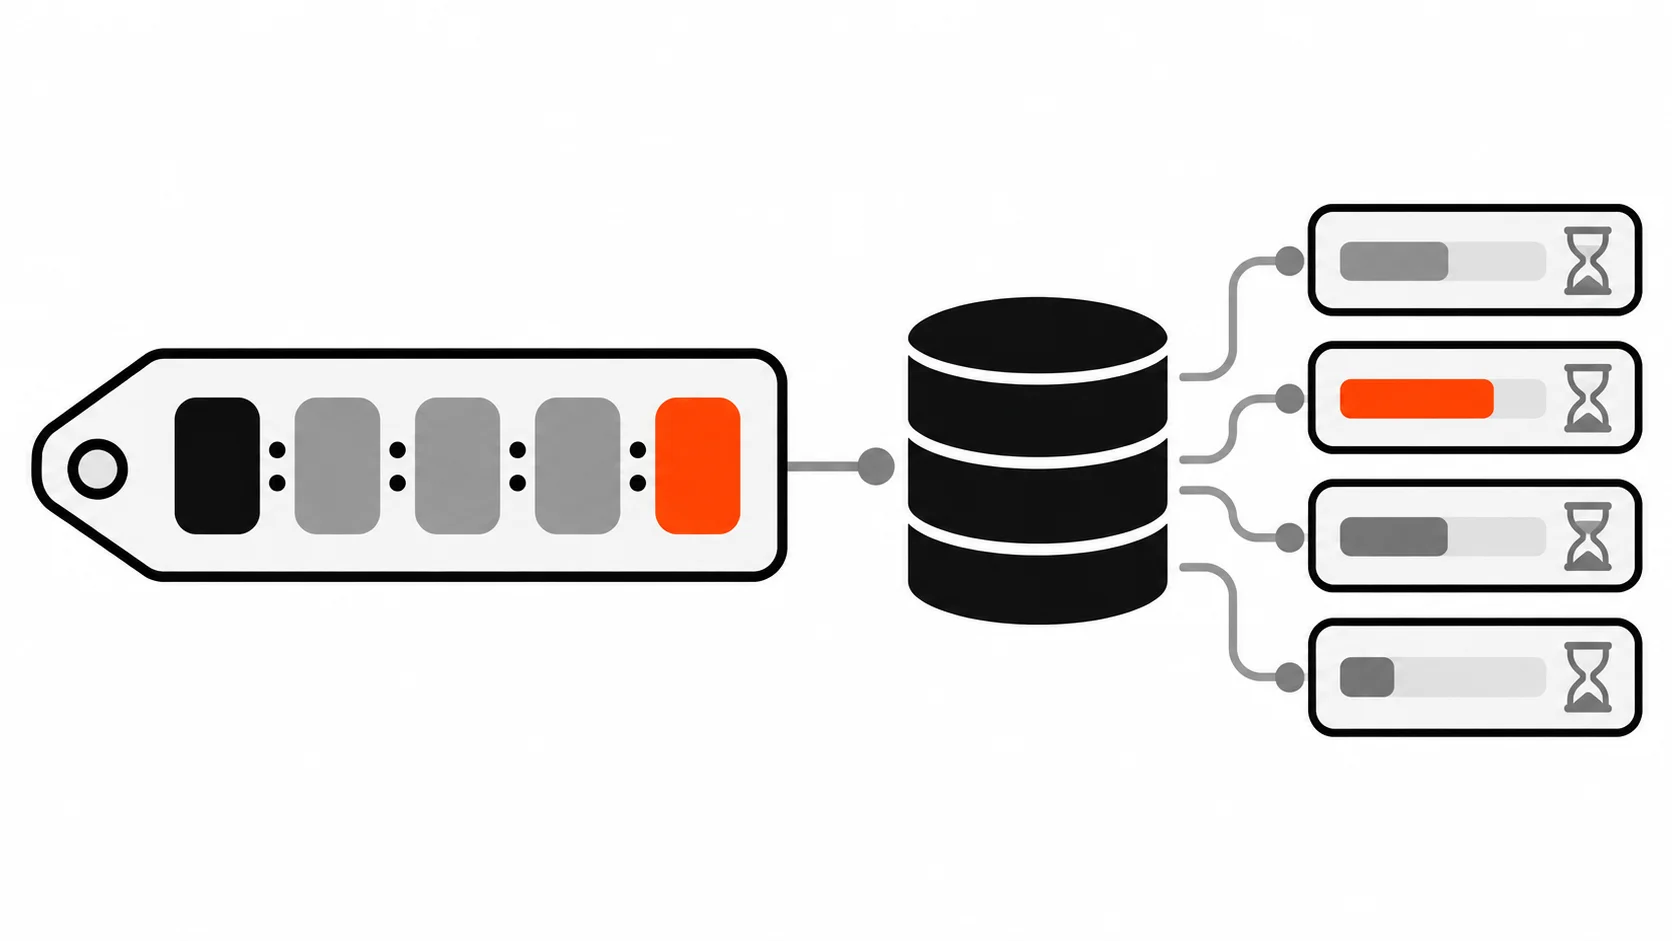
    Diagram of a segmented Redis key tag pointing to a Redis store of per-user counters, each with a small expiry timer
    A readable Redis key: prefix, algorithm, route, identity type and identity, with a TTL so idle keys clean themselves up.

    I keep keys predictable so I can debug them at two in the morning with redis-cli. The pattern I use is prefix, algorithm, route, identity type, identity:

    rl:tb:api:user:8421               # token bucket, general API, user 8421
    rl:tb:search:key:3f9a1c...        # token bucket, search route, hashed API key
    rl:sl:login:ip:203.0.113.24       # sliding log, login route, IPv4 address
    rl:sl:login:ip6:2001:db8:12:34    # sliding log, login route, IPv6 /64 prefix
    rl:fw:otp:phone:5c1e9b...:2905113 # fixed window, OTP route, hashed phone, window id

    Three rules keep this tidy. Every key has a TTL, so callers who disappear do not leave data behind forever. Personal data like phone numbers, emails and API keys is hashed before it goes into the key. And the route is part of the key, so tightening the login limit never affects the general API budget.

    The other important detail is atomicity. If you read the count, decide in Node, and then write it back, two requests arriving at the same moment can both read the old value and both get through. The clean fix is a small Lua script that Redis runs as a single atomic operation. Here is the token bucket I use:

    -- token-bucket.lua
    -- KEYS[1] = bucket key
    -- ARGV[1] = capacity, ARGV[2] = refill tokens per second, ARGV[3] = cost
    local capacity = tonumber(ARGV[1])
    local rate = tonumber(ARGV[2])
    local cost = tonumber(ARGV[3])
    
    -- Use the Redis clock, not the app server clock, to avoid clock skew
    local t = redis.call('TIME')
    local now = tonumber(t[1]) * 1000 + math.floor(tonumber(t[2]) / 1000)
    
    local data = redis.call('HMGET', KEYS[1], 'tokens', 'ts')
    local tokens = tonumber(data[1]) or capacity
    local ts = tonumber(data[2]) or now
    
    local elapsed = math.max(0, now - ts) / 1000
    tokens = math.min(capacity, tokens + elapsed * rate)
    
    local allowed = 0
    local retry_after = 0
    if tokens >= cost then
      tokens = tokens - cost
      allowed = 1
    else
      retry_after = math.ceil((cost - tokens) / rate)
    end
    
    redis.call('HSET', KEYS[1], 'tokens', tokens, 'ts', now)
    redis.call('PEXPIRE', KEYS[1], math.ceil(capacity / rate * 1000) + 1000)
    
    return { allowed, math.floor(tokens), retry_after }

    Notice that the script asks Redis for the time instead of trusting a timestamp passed in from the app. That one line removes a whole class of bugs when your app servers disagree about the time by a second or two.

    Returning 429, Retry-After and RateLimit headers

    When you reject a request, say so properly. The status code is 429 Too Many Requests. Not 403, which tells the client it is forbidden forever, and not 500, which makes your monitoring think the server is broken and makes clients retry immediately.
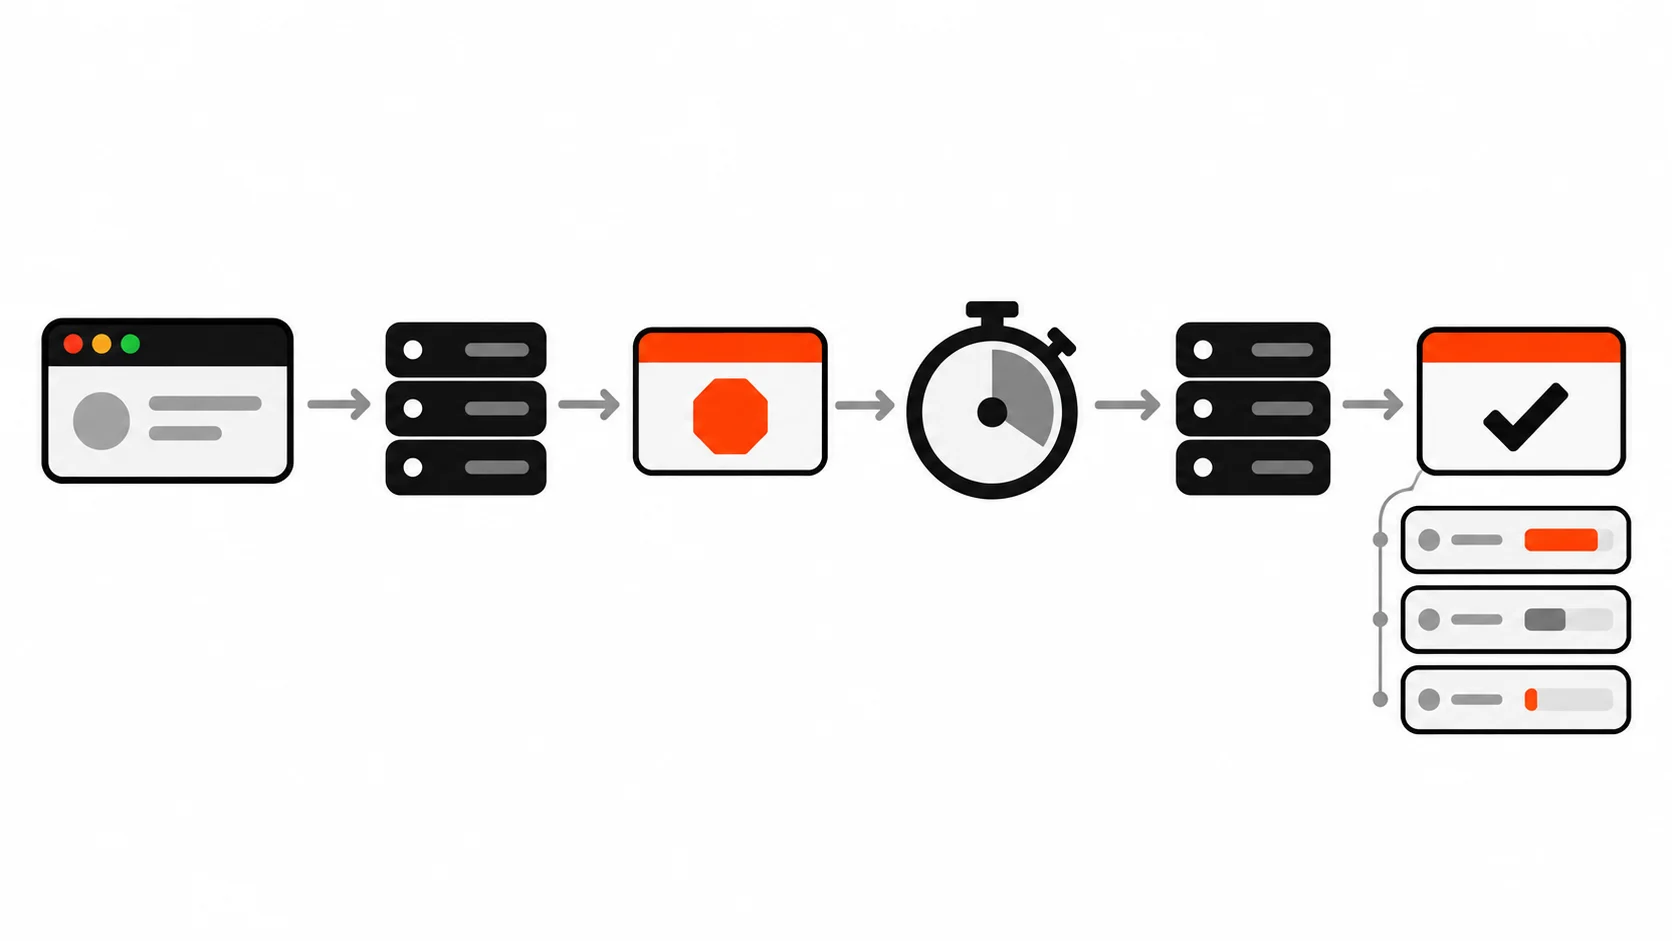
    Timeline of a client request rejected with a 429 response card, a wait timer for Retry-After, and a successful retry afterwards
    A good 429 response tells the client the limit, what is left, and exactly how long to wait before retrying.

    The most useful header you can add is Retry-After, either as a number of seconds or as an HTTP date. It turns a guessing game into an instruction. Well-behaved clients, SDKs and many HTTP libraries will honour it, and it stops them hammering you with instant retries.

    I also send rate limit headers on every response, not just on rejections, so clients can slow down before they hit the wall. The IETF has been standardising these in the RateLimit header fields draft. Earlier versions of the draft used separate RateLimit-Limit, RateLimit-Remaining and RateLimit-Reset headers, and that form is still widely understood. Newer versions combine them into structured RateLimit and RateLimit-Policy fields. Plenty of large APIs still use the older X-RateLimit-* names. Whichever you pick, document it and be consistent.

    HTTP/1.1 429 Too Many Requests
    Content-Type: application/json
    Retry-After: 12
    RateLimit-Limit: 20
    RateLimit-Remaining: 0
    RateLimit-Reset: 12
    
    {"error":"rate_limited","message":"Too many requests. Try again in 12 seconds."}

    Keep the body short and human. A developer reading their logs should immediately understand what happened and how long to wait.

    A working example: Next.js route handler and Express

    Here is the shared helper. It loads the Lua script into ioredis once with defineCommand, works out a caller identity, and returns everything the route needs to build its response headers.

    // lib/rate-limit.ts
    import Redis from 'ioredis';
    import { createHash } from 'node:crypto';
    import { readFileSync } from 'node:fs';
    import path from 'node:path';
    
    const redis = new Redis(process.env.REDIS_URL!);
    
    redis.defineCommand('takeToken', {
      numberOfKeys: 1,
      lua: readFileSync(path.join(process.cwd(), 'lib/token-bucket.lua'), 'utf8'),
    });
    
    const hash = (v: string) => createHash('sha256').update(v).digest('hex').slice(0, 24);
    
    export type Limit = { capacity: number; refillPerSec: number; cost?: number };
    
    export async function takeToken(route: string, identity: string, limit: Limit) {
      const key = `rl:tb:${route}:${identity}`;
      const [allowed, remaining, retryAfter] = (await (redis as any).takeToken(
        key, limit.capacity, limit.refillPerSec, limit.cost ?? 1
      )) as [number, number, number];
      return { allowed: allowed === 1, remaining, retryAfter, limit: limit.capacity };
    }
    
    export function identify(opts: { userId?: string; apiKey?: string | null; ip: string }) {
      if (opts.userId) return `user:${opts.userId}`;
      if (opts.apiKey) return `key:${hash(opts.apiKey)}`;
      return `ip:${opts.ip}`;
    }

    And the route handler in the App Router. Route handlers run on the Node.js runtime by default, which ioredis needs. If you move a handler to the Edge runtime, switch to an HTTP-based Redis client instead.

    // app/api/search/route.ts
    import { NextRequest, NextResponse } from 'next/server';
    import { takeToken, identify } from '@/lib/rate-limit';
    import { getSession } from '@/lib/auth';
    
    export async function GET(req: NextRequest) {
      const session = await getSession(req);
      // Only trust a forwarding header that your own platform or proxy sets
      const ip = req.headers.get('x-forwarded-for')?.split(',')[0]?.trim() ?? 'unknown';
      const id = identify({ userId: session?.userId, apiKey: req.headers.get('x-api-key'), ip });
    
      const rl = await takeToken('search', id, { capacity: 20, refillPerSec: 0.5 });
      const headers = {
        'RateLimit-Limit': String(rl.limit),
        'RateLimit-Remaining': String(rl.remaining),
      };
    
      if (!rl.allowed) {
        return NextResponse.json(
          { error: 'rate_limited', message: `Too many searches. Try again in ${rl.retryAfter} seconds.` },
          { status: 429, headers: { ...headers, 'Retry-After': String(rl.retryAfter) } }
        );
      }
    
      const results = await runSearch(req.nextUrl.searchParams.get('q') ?? '');
      return NextResponse.json(results, { headers });
    }

    The limiter runs before the expensive search query, which is the whole point. A limiter that runs after the database work protects nothing.

    On Express, the same helper drops into a small middleware. The line people forget is trust proxy. Behind a load balancer or a platform proxy, req.ip is the proxy’s address unless you tell Express how many hops to trust, and then every visitor shares one bucket.

    // server.ts
    import express from 'express';
    import { takeToken, identify, type Limit } from './lib/rate-limit';
    
    const app = express();
    app.set('trust proxy', 1); // exactly one trusted proxy in front of the app
    
    const limit = (route: string, cfg: Limit) =>
      async (req: any, res: any, next: any) => {
        const id = identify({ userId: req.user?.id, apiKey: req.get('x-api-key'), ip: req.ip });
        const rl = await takeToken(route, id, cfg);
        res.set('RateLimit-Limit', String(rl.limit));
        res.set('RateLimit-Remaining', String(rl.remaining));
        if (!rl.allowed) {
          res.set('Retry-After', String(rl.retryAfter));
          return res.status(429).json({ error: 'rate_limited', retryAfter: rl.retryAfter });
        }
        next();
      };
    
    app.post('/api/send-otp', limit('otp', { capacity: 3, refillPerSec: 1 / 300 }), sendOtp);
    app.use('/api', limit('api', { capacity: 60, refillPerSec: 1 }));

    That OTP limit allows three codes, then one more every five minutes. It is the exact change that would have saved my client their 4,000 text messages. If you would rather not write your own middleware, express-rate-limit with a Redis store is a solid, well-maintained option, and the same advice about trust proxy and key choice applies.

    Rate limiting WordPress REST and custom endpoints

    WordPress core does not rate limit the REST API, so anything under /wp-json/ is open to as many requests as your server can take. On headless WordPress builds, where a React or Next.js front end talks to WordPress, I treat this seriously, especially for custom endpoints like contact forms, quote requests and newsletter signups.

    My first choice is to limit at the edge, before PHP even starts. A Cloudflare rate limiting rule on /wp-json/dp/v1/contact, or an Nginx limit_req zone, is cheaper than anything you can do inside WordPress. When I need logic that only the app knows about, such as different limits for logged-in users, I hook rest_pre_dispatch, which runs before the endpoint callback and lets me short-circuit with a 429:

    add_filter( 'rest_pre_dispatch', function ( $result, $server, $request ) {
        if ( null !== $result || 0 !== strpos( $request->get_route(), '/dp/v1/contact' ) ) {
            return $result;
        }
    
        $ip     = $_SERVER['REMOTE_ADDR'] ?? 'unknown';
        $window = 600; // 10 minutes
        $limit  = 5;
        $key    = 'contact_' . md5( $ip ) . '_' . (int) floor( time() / $window );
    
        wp_cache_add( $key, 0, 'dp_rate_limit', $window );
        $count = wp_cache_incr( $key, 1, 'dp_rate_limit' );
    
        if ( false !== $count && $count > $limit ) {
            $response = new WP_REST_Response(
                array( 'code' => 'rate_limited', 'message' => 'Too many requests. Please try again later.' ),
                429
            );
            $response->header( 'Retry-After', (string) ( $window - ( time() % $window ) ) );
            return $response;
        }
    
        return $result;
    }, 10, 3 );

    Two warnings from real projects. First, wp_cache_incr is only shared between requests when the site has a persistent object cache such as Redis or Memcached. Without one, the cache lives for a single request and this code silently does nothing. Transients work as a fallback, but they write to the database and are not atomic, so use them only for low-traffic forms. Second, behind Cloudflare or a reverse proxy, REMOTE_ADDR is the proxy’s address. Restore the real visitor IP at the server level so you are not limiting all of Cloudflare as one user.

    Client-side backoff: be a good citizen

    Rate limiting is a conversation, and the client has to hold up its end. When I build front ends or integrations that call someone else’s API, I follow three rules: respect Retry-After when it is present, use exponential backoff with jitter when it is not, and give up after a few attempts instead of retrying forever.

    async function fetchWithBackoff(url: string, init: RequestInit = {}, maxRetries = 4) {
      for (let attempt = 0; ; attempt++) {
        const res = await fetch(url, init);
        if ((res.status !== 429 && res.status !== 503) || attempt >= maxRetries) return res;
    
        const header = res.headers.get('retry-after');
        let waitMs = 2 ** attempt * 500; // 0.5s, 1s, 2s, 4s
        if (header) {
          const seconds = Number(header);
          const date = Date.parse(header);
          if (Number.isFinite(seconds) && seconds > 0) waitMs = seconds * 1000;
          else if (!Number.isNaN(date)) waitMs = Math.max(0, date - Date.now());
        }
        const jitter = Math.random() * waitMs * 0.3;
        await new Promise((r) => setTimeout(r, waitMs + jitter));
      }
    }

    Jitter matters more than people expect. If a hundred clients all hit the limit at the same moment and all wait exactly two seconds, they all come back at the same moment too. A little randomness spreads them out. Only retry requests that are safe to repeat, or that carry an idempotency key, so a retried payment or order never runs twice.

    Common rate limiting mistakes that lock out real users

    These are the problems I find most often when I review an existing setup. Almost all of them hurt legitimate users more than attackers.

    • One global counter. I have seen a limiter keyed on the route alone, so one bot used up the budget and every real user got 429s. Always include a caller identity in the key.
    • Per-IP limits on logged-in traffic. A whole office, school or mobile network can share one IP. Once a user is authenticated, count by user ID or API key instead.
    • No allowlist for webhooks and monitors. Payment providers and other webhook senders deliver in bursts, especially when they replay a backlog after an outage. If you rate limit them, they retry, and you get more traffic, not less. Verify the webhook signature, then skip or raise the limit for that route. Do the same for your own uptime monitors and health checks.
    • Clock skew between servers. If each app server computes window ids or refill time from its own clock, servers a second apart disagree about the state of the same bucket. Use the Redis TIME command inside the script, as in the token bucket above.
    • In-memory limiters on serverless or multiple instances. Each instance counts on its own, so the real limit is your limit multiplied by the number of instances. Use a shared store.
    • Limiting after the expensive work. If the database query or the paid API call has already happened, the 429 saved nothing. Put the limiter first.
    • No Retry-After header. Clients guess, usually badly, and retry immediately. Tell them exactly when to come back.
    • Failing closed when Redis is down. If the limiter cannot reach Redis and blocks everything, your rate limiter just became your outage. For most routes I fail open and log loudly, and only fail closed on high-risk routes like OTP sends.

    My rate limiting checklist

    This is the list I run through before an API goes live on a client project:

    • Every public and authenticated route sits behind a limiter, with tighter budgets for login, signup, password reset, OTP, contact forms, search and exports.
    • Anonymous traffic is keyed by IP (by /64 for IPv6), authenticated traffic by user ID or hashed API key.
    • Counters live in Redis or another shared store, updated atomically with a Lua script or a single atomic command.
    • Keys follow a readable pattern, have a TTL and never contain raw personal data or credentials.
    • Rejections return 429 with Retry-After and a short JSON body, and normal responses include rate limit headers.
    • The trusted proxy and real client IP are configured correctly, and webhook senders and monitors are allowlisted.
    • The limiter runs before any expensive work, and the fail-open or fail-closed behaviour is a deliberate choice per route.
    • 429s are logged and graphed, so a spike tells you about an attack or a broken client before your users do.

    Final thoughts

    Good API rate limiting is invisible to real users and painful for abusers. The algorithm matters less than people think. What matters is counting the right identity, sharing state across instances, rejecting early, and telling clients clearly when to come back. Start with a token bucket per user, a strict sliding log on login and OTP routes, and proper 429 responses. That covers most projects, and it is a one-afternoon job that can save a very expensive morning.

    If you want help adding rate limiting to your Node.js API, Next.js app or WordPress site, get in touch with me and tell me about your project.
  • How to Verify Webhook Signatures (HMAC) the Right Way in Node.js, Next.js and WordPress

    How to Verify Webhook Signatures (HMAC) the Right Way in Node.js, Next.js and WordPress

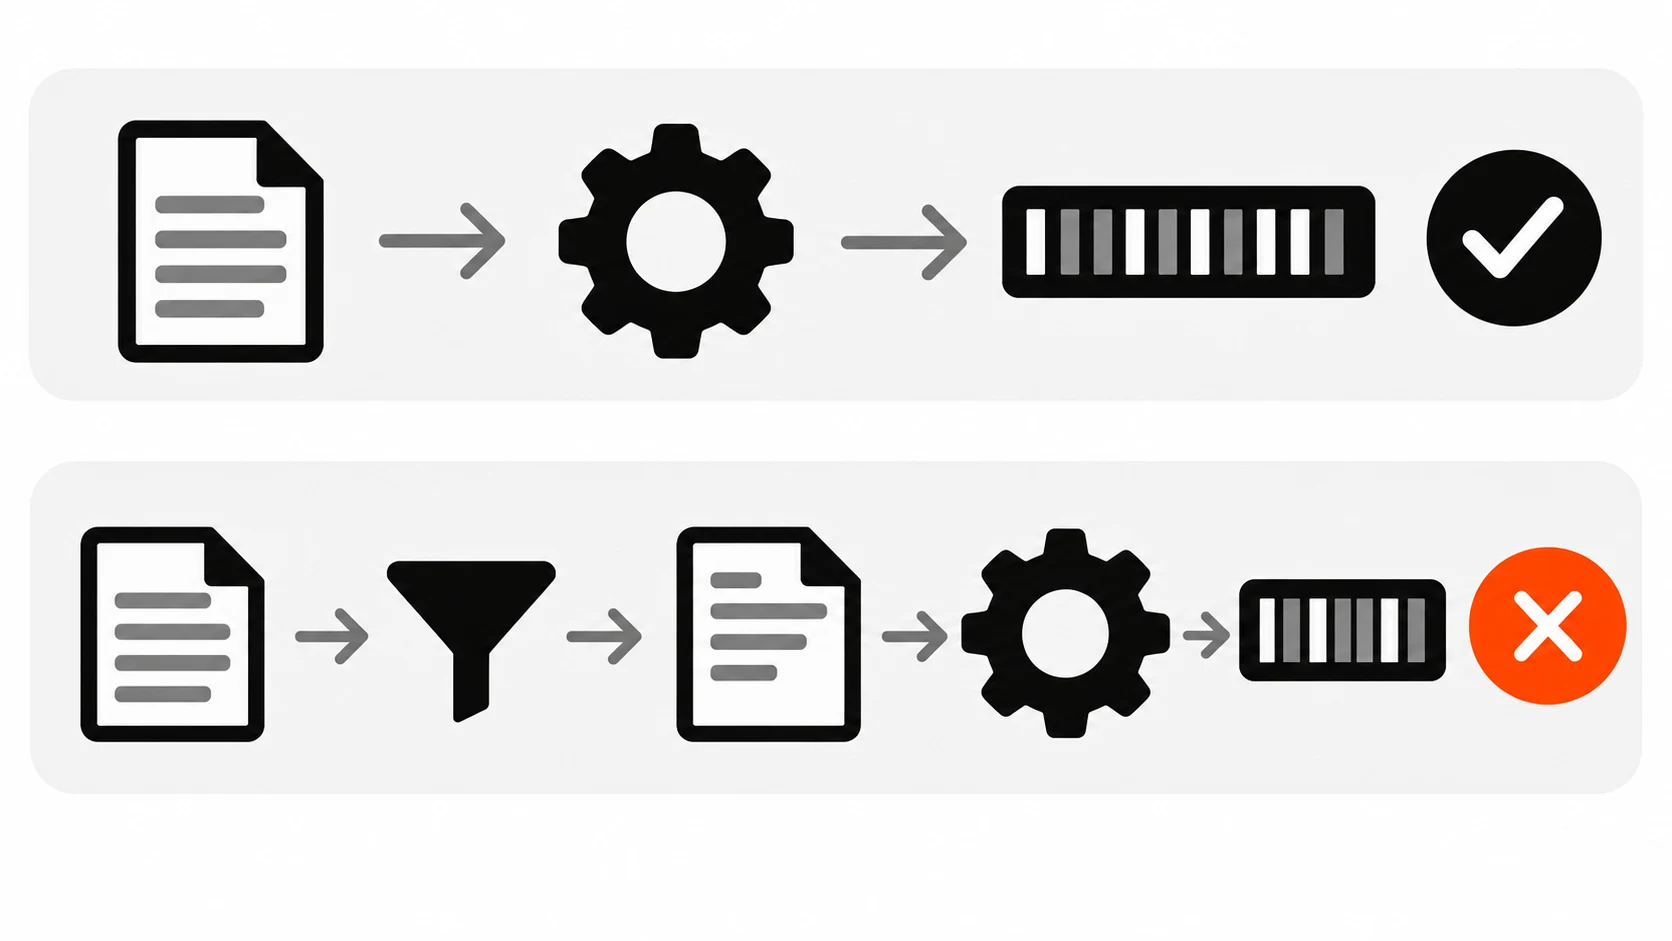
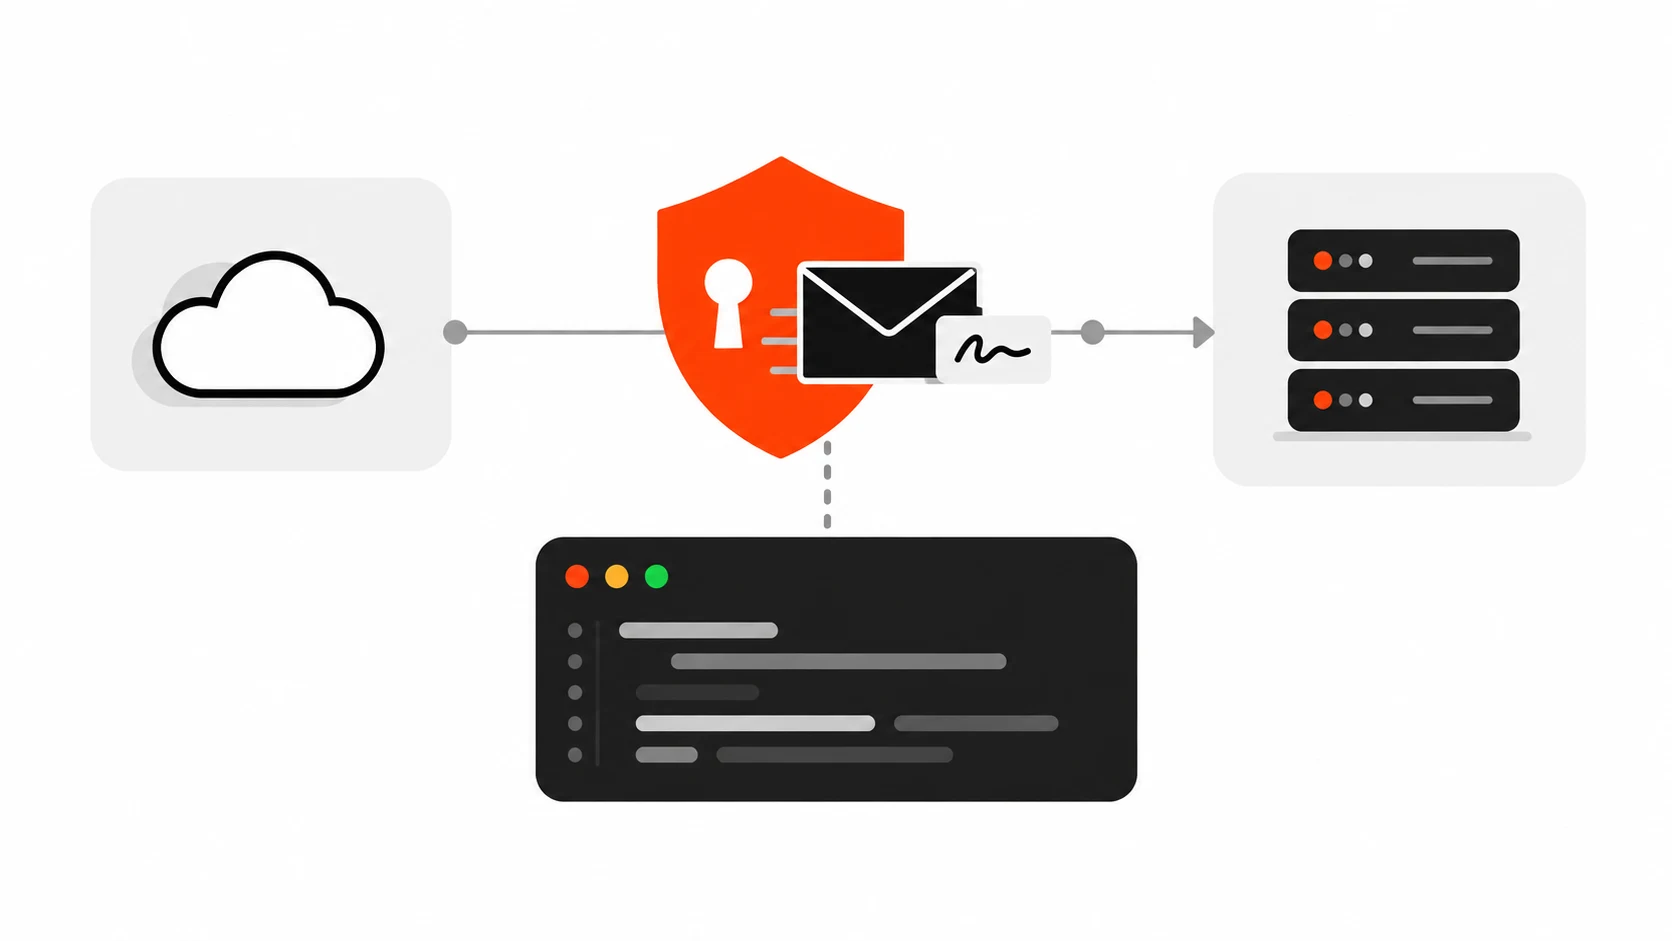
    Flat vector illustration of a webhook request envelope passing through an HMAC signature check shield into a secure server

    A few months ago a client pinged me on a Sunday: their store had marked eleven orders as paid, but the payment provider showed only eight real payments. Nobody had hacked the payment provider. Someone had simply found the public webhook URL and posted fake “payment succeeded” events at it. The endpoint trusted every JSON body that arrived. That is the whole bug, and it is far more common than people think.

    In this guide I will show you exactly how I verify webhook signatures now on every project, whether it is a Stripe integration, a GitHub deploy hook, a WooCommerce order sync, or a custom service I built for a client. You will get working Node.js code for Express and Next.js route handlers, the three mistakes I see most often in code reviews, and a checklist you can paste into your own project README.

    What a webhook signature actually proves

    A webhook is just an HTTP POST from another service to a URL you own. Because that URL is public, anyone on the internet can send a request to it. The signature is how the sender proves two things: that the request really came from them, and that the body was not changed on the way.

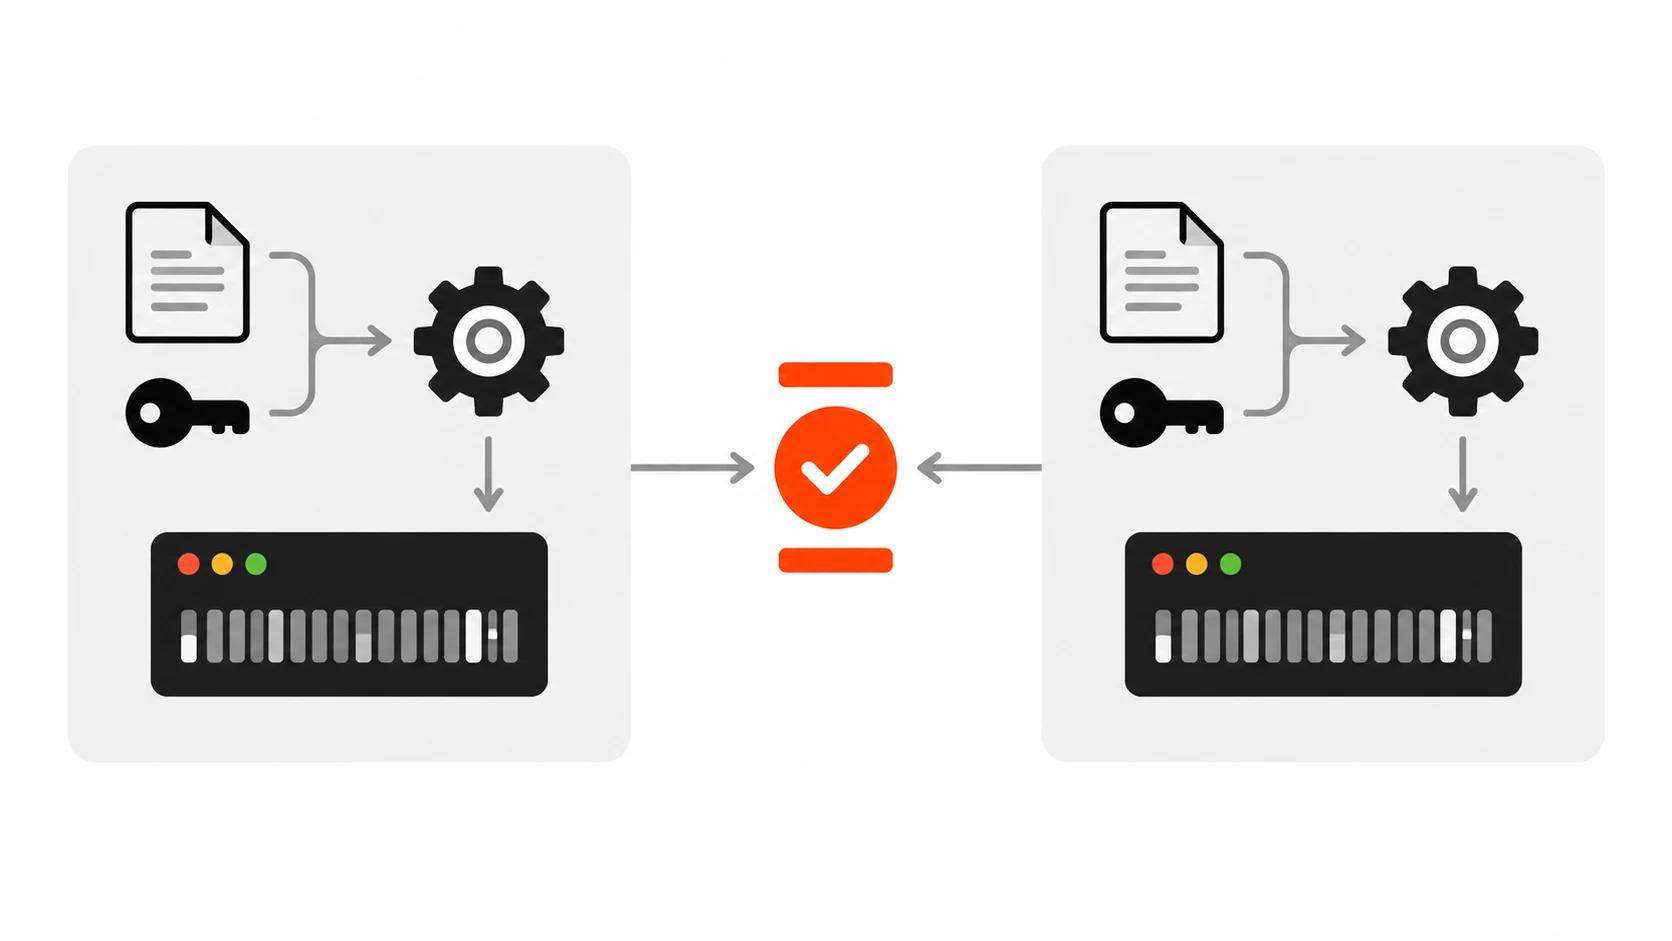
    Almost every provider uses the same idea, called HMAC (hash-based message authentication code). You and the provider share a secret. When the provider sends an event, it computes HMAC-SHA256 of the raw request body using that secret and puts the result in a header. When you receive the request, you compute the same HMAC over the exact bytes you received and compare. If the values match, the sender knew the secret and the body is untouched. If they do not match, you reject the request with a 400 or 401 and do nothing else.

    Here are the header names you will meet most often:

    • Stripe: Stripe-Signature, with a timestamp t= and one or more v1= signatures. The signed payload is the timestamp, a dot, then the raw body.
    • GitHub: X-Hub-Signature-256, formatted as sha256= followed by the hex digest of the raw body.
    • Shopify: X-Shopify-Hmac-Sha256, a base64 digest of the raw body.
    • WooCommerce: X-WC-Webhook-Signature, also a base64 HMAC-SHA256 of the raw body.
    • Standard Webhooks spec (used by several newer platforms): webhook-id, webhook-timestamp and webhook-signature headers.

    Always read the provider docs for the exact format, but once you understand one, the rest are small variations.

    Diagram of the HMAC webhook flow: provider signs the raw body with a shared secret, server recomputes and compares the signature
    How an HMAC webhook signature is created and verified.

    Mistake 1: verifying the parsed JSON instead of the raw body

    This is the number one bug I fix. The developer adds express.json() globally, then tries to verify the signature with JSON.stringify(req.body). It fails randomly, so they “fix” it by commenting out the check. Now the endpoint is wide open again.

    The reason it fails is simple. The provider signed the exact bytes it sent. Parsing and re-stringifying changes those bytes: key order, whitespace, unicode escaping and number formatting can all differ. One extra space and the HMAC is completely different. You must verify against the raw body, before any parser touches it.

    Here is the broken version I see in reviews:

    // BROKEN: signature computed over re-serialized JSON
    app.use(express.json());
    
    app.post('/webhooks/github', (req, res) => {
      const expected = 'sha256=' + crypto
        .createHmac('sha256', process.env.GITHUB_WEBHOOK_SECRET)
        .update(JSON.stringify(req.body))   // not the bytes GitHub signed
        .digest('hex');
    
      if (req.get('X-Hub-Signature-256') !== expected) {  // also a timing leak
        return res.status(401).end();
      }
      // ...
    });

    And here is the fixed version. The webhook route gets its own raw body parser, registered before the global JSON parser, so the body arrives as a Buffer:

    import express from 'express';
    import crypto from 'node:crypto';
    
    const app = express();
    
    // Raw body ONLY for the webhook route, mounted before express.json()
    app.post(
      '/webhooks/github',
      express.raw({ type: 'application/json', limit: '1mb' }),
      (req, res) => {
        const header = req.get('X-Hub-Signature-256') || '';
        if (!verifyGithub(req.body, header, process.env.GITHUB_WEBHOOK_SECRET)) {
          return res.status(401).send('invalid signature');
        }
        const event = JSON.parse(req.body.toString('utf8'));
        // handle event...
        res.status(200).send('ok');
      }
    );
    
    app.use(express.json()); // everything else
    
    function verifyGithub(rawBody, header, secret) {
      const expected = 'sha256=' + crypto
        .createHmac('sha256', secret)
        .update(rawBody)
        .digest('hex');
      return safeEqual(header, expected);
    }

    Mistake 2: comparing signatures with === or !==

    A normal string comparison stops at the first character that differs. In theory, an attacker who can measure response times very precisely can guess a valid signature one character at a time. Over the open internet this is hard, but it is not something you want to argue about in a security review, and the fix costs one line.

    Node ships crypto.timingSafeEqual, which compares two Buffers in constant time. The catch is that it throws if the two Buffers have different lengths, so you check the length first:

    import crypto from 'node:crypto';
    
    export function safeEqual(a, b) {
      const bufA = Buffer.from(String(a), 'utf8');
      const bufB = Buffer.from(String(b), 'utf8');
      if (bufA.length !== bufB.length) return false;
      return crypto.timingSafeEqual(bufA, bufB);
    }

    Checking the length up front leaks only the length of the signature, which is public anyway because it is a fixed-size hex or base64 digest. That is fine.

    Comparison showing why re-serialized JSON produces a different hash than the original raw request body
    Verify the raw bytes, not JSON.stringify of the parsed body.

    Mistake 3: no timestamp check, so old events can be replayed

    A valid signature proves the provider sent a request at some point. It does not prove the provider sent it just now. If an attacker captures one legitimate request, from a leaked log, a misconfigured proxy, or a debugging tool someone left running, they can resend it again and again. Your signature check will pass every time.

    This is why Stripe and the Standard Webhooks spec include a timestamp inside the signed payload. Because the timestamp is part of what is signed, it cannot be changed without breaking the signature. You then reject anything older than a small window, usually five minutes.

    Here is a hand-written Stripe-style verifier so you can see every step. In a real Stripe project I use the official SDK method stripe.webhooks.constructEvent(rawBody, signature, secret), which does exactly this, but it is worth understanding what happens inside:

    const TOLERANCE_SECONDS = 300; // 5 minutes
    
    export function verifyStripeStyle(rawBody, header, secret) {
      // header looks like: t=1760000000,v1=abc123...,v1=def456...
      let timestamp = null;
      const signatures = [];
      for (const item of header.split(',')) {
        const [key, value] = item.split('=');
        if (key === 't') timestamp = Number(value);
        if (key === 'v1') signatures.push(value);
      }
      if (!timestamp || signatures.length === 0) return false;
    
      const age = Math.abs(Math.floor(Date.now() / 1000) - timestamp);
      if (age > TOLERANCE_SECONDS) return false; // replay or bad clock
    
      const signedPayload = `${timestamp}.${rawBody.toString('utf8')}`;
      const expected = crypto
        .createHmac('sha256', secret)
        .update(signedPayload)
        .digest('hex');
    
      return signatures.some((sig) => safeEqual(sig, expected));
    }

    Notice that it accepts any of several v1 values. Providers send more than one during secret rotation, which brings me to the next point.

    Doing the same thing in a Next.js route handler

    Most of my newer client builds are Next.js App Router projects, and webhooks there are actually easier, because a route handler gives you the raw body directly. Just call await request.text() and do not call request.json() first. A Request body can only be read once.

    // app/api/webhooks/woocommerce/route.js
    import crypto from 'node:crypto';
    
    export const runtime = 'nodejs'; // node:crypto needs the Node runtime
    
    export async function POST(request) {
      const rawBody = await request.text();
      const received = request.headers.get('x-wc-webhook-signature') || '';
    
      const expected = crypto
        .createHmac('sha256', process.env.WC_WEBHOOK_SECRET)
        .update(rawBody, 'utf8')
        .digest('base64');
    
      if (!safeEqual(received, expected)) {
        return new Response('invalid signature', { status: 401 });
      }
    
      const order = JSON.parse(rawBody);
      await queueOrderSync(order.id); // do the slow work elsewhere
      return new Response('ok', { status: 200 });
    }

    If you deploy to an edge runtime, node:crypto is not available. In that case use the Web Crypto API: crypto.subtle.importKey with the HMAC algorithm, then crypto.subtle.verify, which also performs a constant-time comparison for you.

    async function verifyHmacEdge(rawBody, signatureHex, secret) {
      const enc = new TextEncoder();
      const key = await crypto.subtle.importKey(
        'raw', enc.encode(secret),
        { name: 'HMAC', hash: 'SHA-256' },
        false, ['verify']
      );
      const sigBytes = new Uint8Array(
        signatureHex.match(/../g).map((h) => parseInt(h, 16))
      );
      return crypto.subtle.verify('HMAC', key, sigBytes, enc.encode(rawBody));
    }

    Handle duplicates even when the signature is valid

    Providers retry. If your endpoint times out or returns a 500, the same event will arrive again, often several times over a few hours. A perfectly valid, perfectly signed duplicate can still charge a customer twice or send two confirmation emails.

    So after verification I store the event id (Stripe event.id, GitHub X-GitHub-Delivery, the Standard Webhooks webhook-id) in a table with a unique constraint. If the insert fails because the id already exists, I return 200 and skip processing. I wrote a full post on this pattern in my guide to API idempotency keys, and it applies to webhooks just as well.

    -- one row per processed delivery
    CREATE TABLE webhook_events (
      provider    TEXT NOT NULL,
      event_id    TEXT NOT NULL,
      received_at TIMESTAMPTZ NOT NULL DEFAULT now(),
      PRIMARY KEY (provider, event_id)
    );
    Diagram of timestamp window and event id table rejecting replayed and duplicate webhook deliveries
    Timestamp checks stop replays; an event id table stops duplicates.

    Respond fast, process later

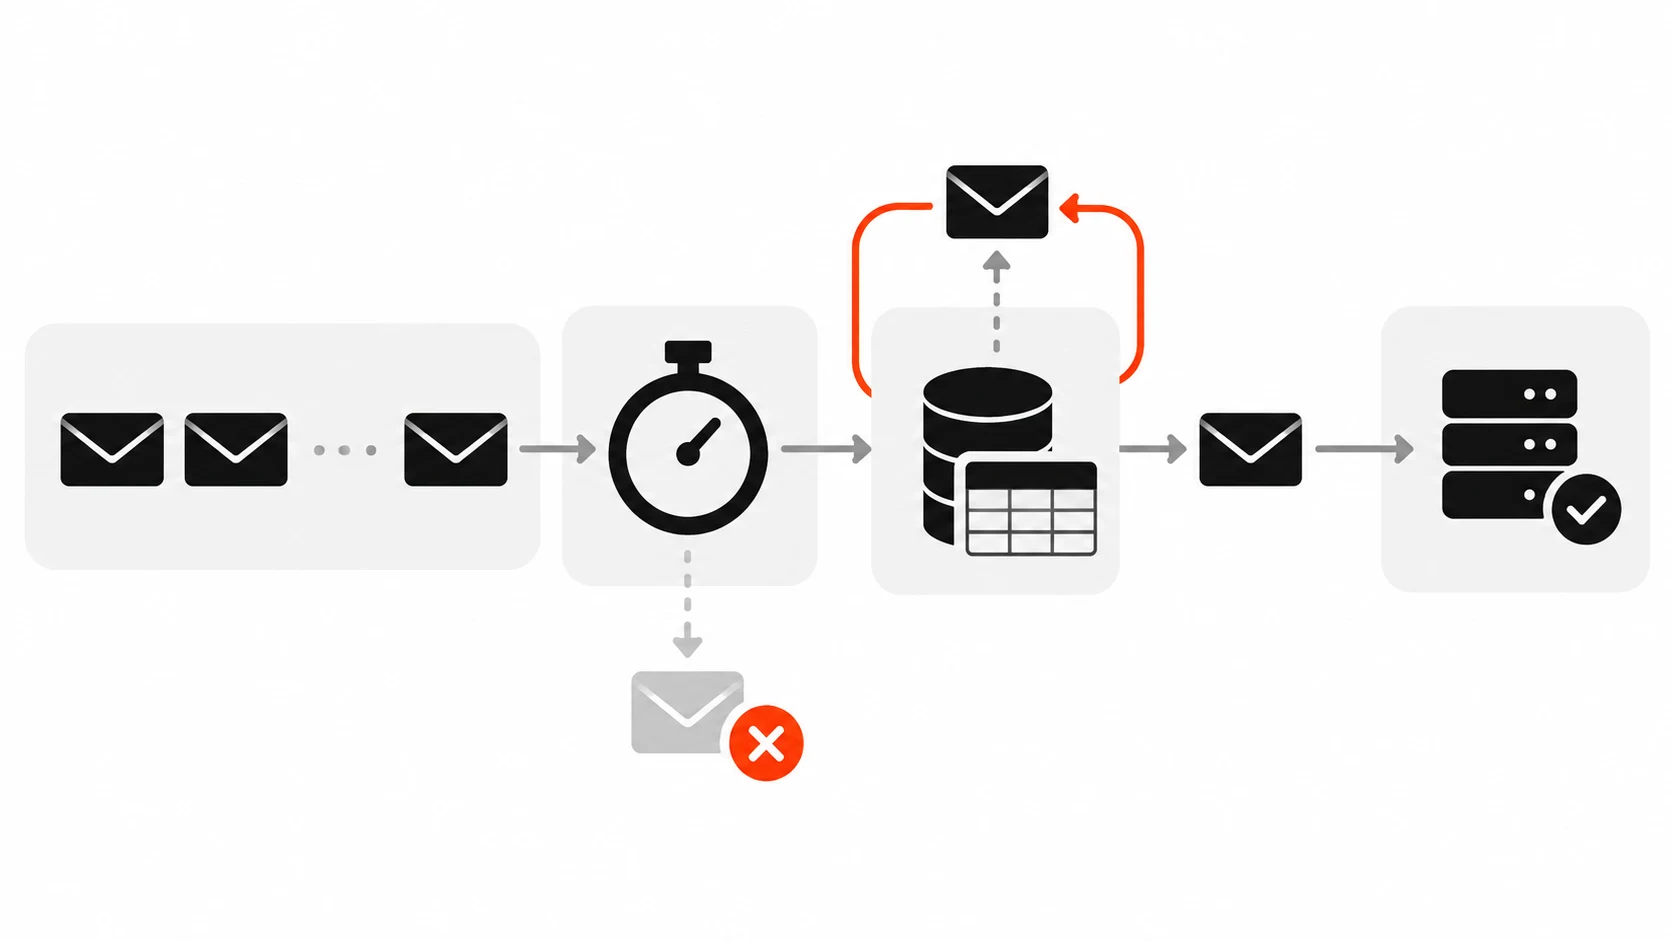
    Most providers expect a 2xx response within a few seconds, and they treat anything slower as a failure and retry. That is how a slow image resize or CRM sync turns into five duplicate deliveries. My rule: verify, record the event id, push a job to a queue (or a database table that a cron worker reads), return 200. The real work happens in the background where it can take as long as it needs and retry on its own terms.

    Secrets: storage and rotation

    • Keep each webhook secret in an environment variable, never in the repo and never in a WordPress option that a plugin can print into a debug page.
    • Use a different secret per environment. Your staging endpoint should not accept production signatures.
    • Support two secrets during rotation. Verify against the new one first, fall back to the old one, and remove the old one after the provider has fully switched over.
    • Never log the secret or the full signature header. Log the event id and the verification result.
    const secrets = [process.env.WEBHOOK_SECRET, process.env.WEBHOOK_SECRET_OLD]
      .filter(Boolean);
    
    const ok = secrets.some((s) => verifyGithub(rawBody, header, s));

    Testing your verification locally

    Do not wait for production to find out your check is wrong. I write one small test that signs a fixture body with a test secret, sends it to the handler, and expects a 200, then changes a single character in the body and expects a 401. That pair of tests catches the raw body bug immediately, because a framework upgrade that silently adds a JSON parser will make the first test fail.

    import crypto from 'node:crypto';
    import assert from 'node:assert/strict';
    import test from 'node:test';
    
    const secret = 'test_secret';
    const body = Buffer.from('{"action":"opened","number":42}');
    const sig = 'sha256=' + crypto.createHmac('sha256', secret).update(body).digest('hex');
    
    test('accepts a correct signature', () => {
      assert.equal(verifyGithub(body, sig, secret), true);
    });
    
    test('rejects a tampered body', () => {
      const tampered = Buffer.from('{"action":"opened","number":43}');
      assert.equal(verifyGithub(tampered, sig, secret), false);
    });

    For end-to-end checks, most providers have a CLI or dashboard button that sends a signed test event. The Stripe CLI command stripe listen --forward-to localhost:3000/api/webhooks/stripe is the one I use most, and GitHub has a “Redeliver” button on every recent delivery in the webhook settings page.

    What about WordPress?

    A lot of my clients run WordPress, and custom REST endpoints there have the same problem. If you register a route with register_rest_route to receive webhooks, read the raw body with $request->get_body(), compute hash_hmac('sha256', $body, $secret), and compare with hash_equals(), which is the PHP constant-time comparison. Do not use 'permission_callback' => '__return_true' and then forget the signature check, which is exactly how the client store from the start of this post got its fake orders.

    function dp_verify_webhook( WP_REST_Request $request ) {
        $body     = $request->get_body();
        $received = $request->get_header( 'x_wc_webhook_signature' );
        $expected = base64_encode( hash_hmac( 'sha256', $body, DP_WC_WEBHOOK_SECRET, true ) );
        return is_string( $received ) && hash_equals( $expected, $received );
    }

    My webhook security checklist

    This is the list I paste into the README of every project that receives webhooks. If any line is not true, the endpoint is not ready for production:

    • The signature is computed over the raw request body, before any JSON parser runs.
    • Comparison uses crypto.timingSafeEqual, crypto.subtle.verify or hash_equals, never ===.
    • Signed timestamps older than five minutes are rejected.
    • Processed event ids are stored with a unique constraint, so duplicates are skipped.
    • The handler returns 2xx within a couple of seconds and moves slow work to a queue.
    • Secrets live in environment variables, differ per environment, and support rotation.
    • There is a test that proves a tampered body is rejected.
    • Invalid signatures are logged (without the secret) and alerted on if they spike.

    Wrapping up

    The fix for the client store took about forty minutes: raw body parsing on the webhook route, a constant-time comparison, a timestamp window and an event id table. The fake orders stopped that same day, and they now get an alert if more than a handful of invalid signatures arrive in an hour. If you are running any webhook endpoint today, open it right now and check one thing: what bytes are you actually hashing? If the answer involves JSON.stringify, you know what to fix first.

    If you want a second pair of eyes on your webhook or API integrations, that is a big part of what I do for clients. Feel free to get in touch through my site.

  • Idempotency Keys in 2026: Stop Duplicate Payments and Double Submits in Your API

    Idempotency Keys in 2026: Stop Duplicate Payments and Double Submits in Your API

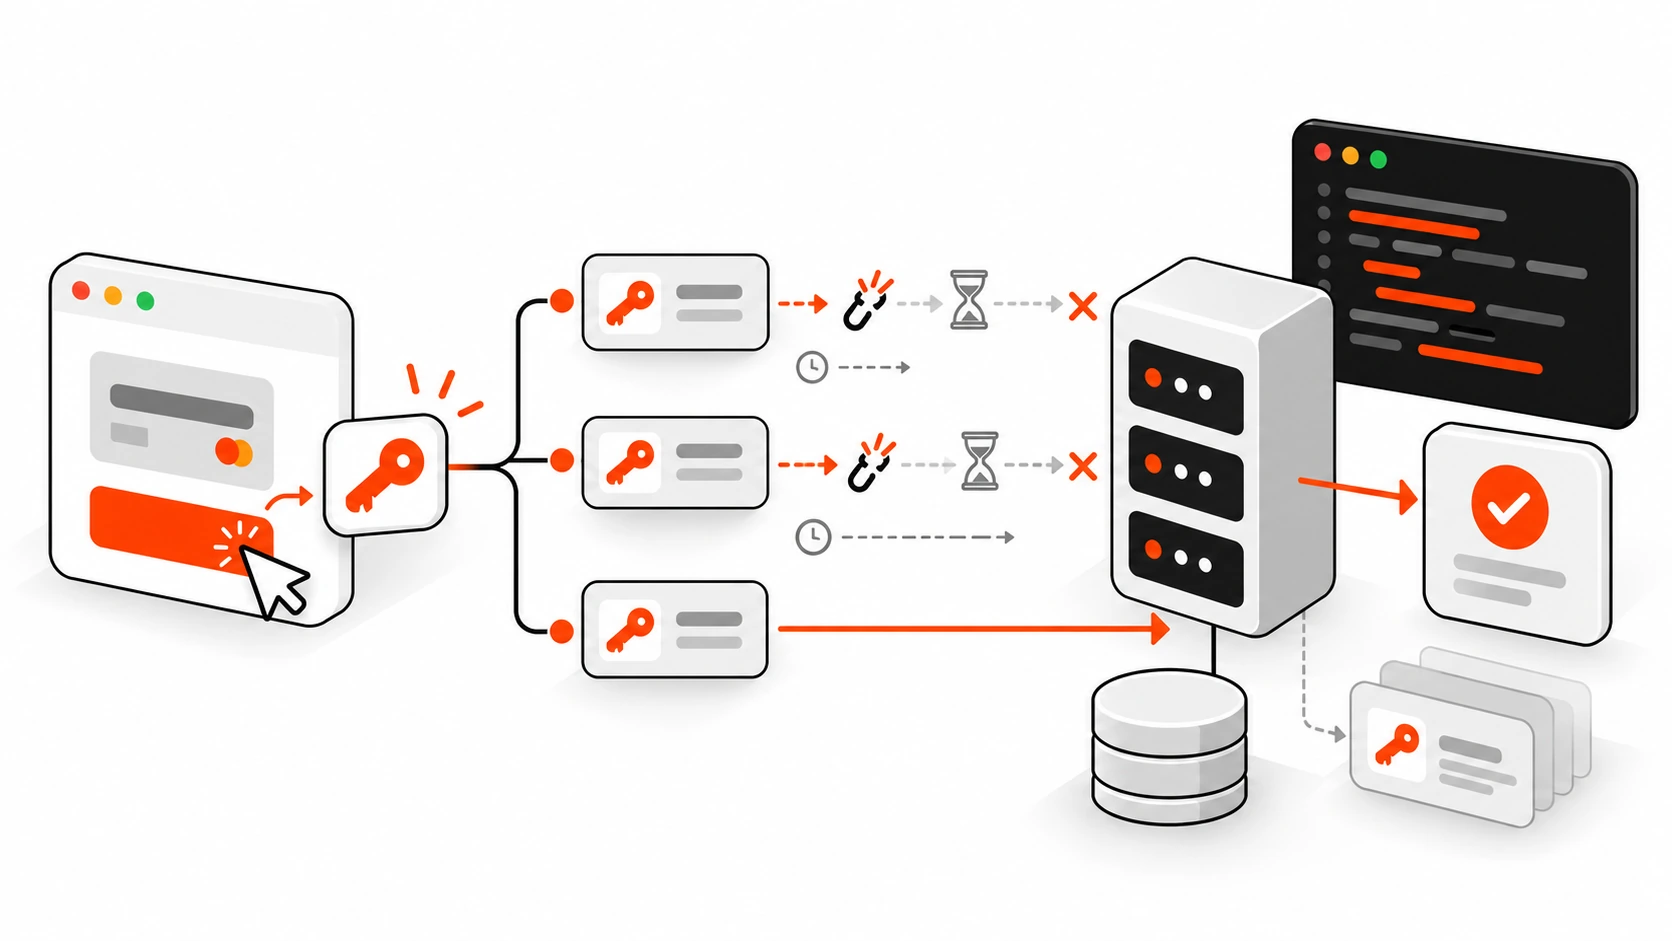
    Flat vector illustration of a checkout request passing through an idempotency key gate so only one order is created despite repeated retries

    A few years ago a client called me on a Monday morning, not angry, just confused. Three customers had been charged twice for the same order over the weekend. Nothing was “broken”. The checkout worked, the payment provider worked, the database worked. What happened was boring: a slow mobile network, an impatient double tap on the Pay button, and a frontend retry that fired after a timeout while the first request was still quietly succeeding on the server.

    That was the week I stopped treating retries as a frontend detail. Today, every API I build for a client that creates money, orders, bookings, or emails gets idempotency keys from day one. It is one of the cheapest reliability upgrades you can make, and in 2026 it matters more than ever, because our clients are wrapped in retries: fetch wrappers, service workers, queue consumers, serverless platforms, and payment SDKs all retry on your behalf.

    In this guide I will walk through how I design idempotency keys for real projects: what the Idempotency-Key header is, how to store keys in Postgres or Redis, how to handle concurrent retries and mismatched payloads, how to wire it into an Express or Next.js API, and how the same idea protects webhook handlers. Real code, real status codes, and the mistakes I have actually made.

    What Idempotency Actually Means for an API

    An operation is idempotent when doing it once or doing it ten times leaves the server in the same state. HTTP already defines some methods this way. In RFC 9110, GET, HEAD, PUT, DELETE, OPTIONS, and TRACE are idempotent. Sending the same PUT /users/42 twice should not create two users; it just sets the same data again.

    POST and PATCH are not idempotent by definition, and that is exactly where the damage happens. POST /orders, POST /payments, POST /bookings, POST /contact all create something new each time they run. If the network drops the response after the server has done the work, the client has no way to know whether it is safe to try again.

    That gap is what an idempotency key closes. The client generates a unique key for one logical action, sends it with the request, and reuses the exact same key on every retry of that action. The server remembers the key and the result. The first request does the work. Every repeat with the same key gets the stored result back instead of running the side effect again.

    Note the important word: logical action. A key is not per HTTP request. It is per user intent. “Place this order” is one intent, even if it takes four network attempts to get a response.

    The Idempotency-Key Header and Who Already Uses It

    You do not have to invent a convention. Stripe made the Idempotency-Key request header popular years ago, and the IETF HTTPAPI working group has been standardizing it as “The Idempotency-Key HTTP Header Field”. Other providers use their own names for the same idea, for example PayPal accepts a PayPal-Request-Id header on many of its REST calls.

    The pattern is the same everywhere:

    • The client sends Idempotency-Key: <unique value> on a non-idempotent request such as POST.
    • The server stores the key together with a fingerprint of the request and, once done, the response.
    • A retry with the same key and the same payload returns the original response.
    • A retry with the same key but a different payload is rejected, because that is almost always a client bug.

    The IETF draft also suggests clear status codes, and I follow them because they make debugging much easier:

    • 400 Bad Request when a key is required for that endpoint but missing.
    • 409 Conflict when a retry arrives while the original request is still being processed.
    • 422 Unprocessable Content when the same key is reused with a different request payload.

    Stripe also sends an Idempotent-Replayed: true response header when it returns a stored result. I copy that idea in my own APIs. It costs nothing and makes logs and support tickets far easier to read.

    How I Generate Idempotency Keys on the Client

    The key needs to be unique per intent and unguessable enough that one user cannot collide with another. A UUID v4 is perfect, and in 2026 you do not need a library for it. crypto.randomUUID() is available in all modern browsers (in secure contexts) and in Node.js.

    The rule that matters most: create the key when the user starts the action, not inside the retry loop. If you generate a fresh key on every attempt, you have built a very expensive way to do nothing.

    // One key per checkout attempt, created when the user clicks Pay.
    async function placeOrder(cart) {
      const idempotencyKey = crypto.randomUUID();
      return postWithRetry('/api/orders', cart, idempotencyKey);
    }
    
    async function postWithRetry(url, body, idempotencyKey, attempts = 3) {
      let lastError;
      for (let i = 0; i < attempts; i++) {
        try {
          const res = await fetch(url, {
            method: 'POST',
            headers: {
              'Content-Type': 'application/json',
              'Idempotency-Key': idempotencyKey,
            },
            body: JSON.stringify(body),
            signal: AbortSignal.timeout(10000),
          });
          if (res.status === 409) {
            // Original request still running on the server: wait, then retry same key.
            await new Promise((r) => setTimeout(r, 1000 * (i + 1)));
            continue;
          }
          return res;
        } catch (err) {
          lastError = err; // timeout or network drop: safe to retry with the SAME key
          await new Promise((r) => setTimeout(r, 500 * 2 ** i));
        }
      }
      throw lastError;
    }

    A few details I care about here. AbortSignal.timeout() gives every attempt a hard deadline, so a hanging connection does not freeze the UI. The backoff grows between attempts, so a struggling server is not hammered. And a 409 is treated as “please wait”, not as a failure. (If you want the full story on timeouts and cancellation, I wrote a separate guide on AbortController in 2026. Cancelling a request on the client never guarantees the server did not process it, which is exactly why idempotency keys matter.)

    If the user can refresh the page mid-checkout, I also keep the key in sessionStorage until the order succeeds. That way a reload followed by another click still reuses the same key instead of creating a second order.

    Infographic showing a client creating one idempotency key per user action and reusing it across timed-out retries
    Infographic 1: One key per user intent, reused on every retry with backoff.

    Designing the Server Side: Store, Fingerprint, Replay

    On the server, an idempotency layer needs to answer four questions for every request that carries a key:

    1. Have I seen this key before for this user?
    2. If yes, is the request payload the same as last time?
    3. Is the original request finished, or still running?
    4. If finished, what response should I replay?

    Scope keys to the caller

    Never treat keys as global. Store them per account, per API client, or per user. Otherwise two different customers who happen to send the same key (or one malicious client guessing keys) could receive each other’s stored responses. In my tables the primary key is always the pair of user and key.

    Fingerprint the request

    Store a hash of the parts of the request that define the intent: method, path, and the normalized body. If a retry arrives with the same key but a different hash, return 422. This catches real bugs, like a frontend that reuses a key across two different carts.

    import { createHash } from 'node:crypto';
    
    function fingerprint(req) {
      const payload = JSON.stringify({ method: req.method, path: req.path, body: req.body });
      return createHash('sha256').update(payload).digest('hex');
    }

    If your clients send JSON with keys in different orders, sort the object keys before hashing, or hash only the specific fields that matter for the operation.

    A Postgres table for idempotency keys

    For most client projects Postgres is already there, so I start with a table. The unique constraint does the heavy lifting under concurrency, which is far safer than a “check, then insert” in application code.

    CREATE TABLE idempotency_keys (
      user_id        bigint      NOT NULL,
      idem_key       text        NOT NULL,
      request_hash   text        NOT NULL,
      status         text        NOT NULL DEFAULT 'processing',
      response_code  integer,
      response_body  jsonb,
      created_at     timestamptz NOT NULL DEFAULT now(),
      PRIMARY KEY (user_id, idem_key)
    );
    
    CREATE INDEX idempotency_keys_created_at_idx ON idempotency_keys (created_at);

    The created_at index is there for cleanup. Stripe documents that keys can be pruned once they are at least 24 hours old, and I use a similar window: anything older than 24 to 72 hours gets deleted by a scheduled job. Pick a retention that is longer than your longest realistic retry window.

    Express Middleware for Idempotent POST Requests

    Here is a trimmed version of the middleware I drop into Express APIs. It uses the pg library and the table above. The core trick is INSERT ... ON CONFLICT DO NOTHING: only one request can win the insert, so only one request ever runs the real handler.

    import express from 'express';
    import pg from 'pg';
    
    const pool = new pg.Pool({ connectionString: process.env.DATABASE_URL });
    const app = express();
    app.use(express.json());
    
    async function idempotency(req, res, next) {
      const key = req.get('Idempotency-Key');
      if (!key) return res.status(400).json({ error: 'Idempotency-Key header is required' });
      if (key.length > 255) return res.status(400).json({ error: 'Idempotency-Key is too long' });
    
      const userId = req.user.id; // set by your auth middleware
      const hash = fingerprint(req);
    
      const inserted = await pool.query(
        `INSERT INTO idempotency_keys (user_id, idem_key, request_hash)
         VALUES ($1, $2, $3)
         ON CONFLICT (user_id, idem_key) DO NOTHING
         RETURNING idem_key`,
        [userId, key, hash]
      );
    
      if (inserted.rowCount === 0) {
        const { rows } = await pool.query(
          'SELECT request_hash, status, response_code, response_body FROM idempotency_keys WHERE user_id = $1 AND idem_key = $2',
          [userId, key]
        );
        const saved = rows[0];
        if (saved.request_hash !== hash) {
          return res.status(422).json({ error: 'Idempotency-Key reused with a different payload' });
        }
        if (saved.status === 'processing') {
          res.set('Retry-After', '1');
          return res.status(409).json({ error: 'Original request is still in progress' });
        }
        res.set('Idempotent-Replayed', 'true');
        return res.status(saved.response_code).json(saved.response_body);
      }
    
      // First time we see this key: capture the response so we can replay it later.
      const originalJson = res.json.bind(res);
      res.json = (body) => {
        const done = res.statusCode < 500
          ? pool.query(
              `UPDATE idempotency_keys SET status = 'completed', response_code = $3, response_body = $4
               WHERE user_id = $1 AND idem_key = $2`,
              [userId, key, res.statusCode, JSON.stringify(body)]
            )
          : pool.query('DELETE FROM idempotency_keys WHERE user_id = $1 AND idem_key = $2', [userId, key]);
        done.catch((err) => console.error('idempotency store failed', err));
        return originalJson(body);
      };
      next();
    }
    
    app.post('/api/orders', idempotency, async (req, res) => {
      const order = await createOrderAndCharge(req.user.id, req.body);
      res.status(201).json(order);
    });

    Two decisions in there deserve a sentence each.

    Which results do I store? Successful responses and client errors (4xx) get stored and replayed, because retrying a validation error with the same payload will fail the same way. Server errors (5xx) delete the key, so the client can retry and the work can actually be attempted again. That only works if your handler is careful about partial side effects, which brings us to transactions.

    Where does the side effect happen? If you can, write the order row and the idempotency record in the same database transaction. If the side effect is external, like a card charge, pass your idempotency key (or a key derived from it) to the payment provider as well. Stripe’s API accepts the Idempotency-Key header on its own POST requests, so a retry from your server will not double charge either. Idempotency should be end to end, not just at your front door.

    Infographic of the server idempotency flow: insert key, compare request fingerprint, return 409 while processing, 422 on mismatch, or replay the stored response
    Infographic 2: Store, fingerprint, replay. The 400, 409 and 422 decision flow.

    Handling Concurrency: The Part Everyone Gets Wrong

    The most common broken implementation I see in code reviews looks like this: SELECT the key, if it is not there run the handler, then INSERT the key. Under a double tap, both requests run the SELECT at nearly the same time, both see nothing, and both create the order. You have built idempotency that only works when nobody needs it.

    The fix is to make the database decide. A primary key or unique constraint plus ON CONFLICT DO NOTHING (Postgres) or INSERT IGNORE (MySQL) means exactly one request wins the row. The loser immediately learns the key is taken and returns 409 until the winner finishes.

    If you prefer Redis for the lock and short-term storage, the equivalent atomic primitive is SET with the NX and EX options:

    // Only one request can create the lock; it expires after 24 hours.
    const acquired = await redis.set(`idem:${userId}:${key}`, JSON.stringify({ status: 'processing', hash }), {
      NX: true,
      EX: 60 * 60 * 24,
    });
    if (!acquired) {
      // Read the stored record and return 409, 422, or the replayed response.
    }

    That snippet uses the node-redis v4+ option style. With ioredis the same call is written as redis.set(name, value, 'EX', 86400, 'NX'). Either way, the important part is that the existence check and the write are one atomic command.

    One more edge case: a request that crashes halfway leaves a key stuck in processing. I add a locked_at timestamp (or rely on the Redis expiry) and let a key be taken over if it has been processing for longer than the maximum handler time, for example five minutes. Without that, a single crash can block a user’s retry for the entire retention window.

    Idempotency in Next.js Route Handlers and Server Actions

    On Next.js App Router projects the same logic lives inside a Route Handler. The Request object gives you headers directly:

    // app/api/orders/route.ts
    export async function POST(request: Request) {
      const key = request.headers.get('Idempotency-Key');
      if (!key) {
        return Response.json({ error: 'Idempotency-Key header is required' }, { status: 400 });
      }
      const body = await request.json();
      const userId = await getUserIdFromSession();
    
      const result = await withIdempotency(userId, key, body, () => createOrder(userId, body));
      return Response.json(result.body, {
        status: result.status,
        headers: result.replayed ? { 'Idempotent-Replayed': 'true' } : {},
      });
    }

    withIdempotency is just the Express logic above pulled into a plain function that returns { status, body, replayed }, which makes it easy to unit test and reuse across endpoints.

    For Server Actions, there is no custom header you control from a plain form. My approach is a hidden input: the Server Component generates a key with randomUUID() from node:crypto and renders it as <input type="hidden" name="idempotencyKey" value={key} /> inside the form, and the action reads it with formData.get('idempotencyKey'). A double submit of the same rendered form sends the same key, so the second call gets the stored result. Pair that with a disabled submit button while the form is pending and double submits stop being a support ticket.

    Webhooks: Idempotency on the Receiving Side

    Idempotency is not only for APIs you expose to your own frontend. It is just as important for webhooks you receive. Payment providers, CRMs, and form tools deliver webhooks “at least once”, which means you will sometimes get the same event twice, especially after a timeout on your side.

    Stripe events, for example, carry a unique event id such as evt_.... I store processed event IDs in a table with a unique constraint and skip any event I have already handled:

    CREATE TABLE processed_webhook_events (
      provider     text        NOT NULL,
      event_id     text        NOT NULL,
      processed_at timestamptz NOT NULL DEFAULT now(),
      PRIMARY KEY (provider, event_id)
    );
    const { rowCount } = await pool.query(
      'INSERT INTO processed_webhook_events (provider, event_id) VALUES ($1, $2) ON CONFLICT DO NOTHING',
      ['stripe', event.id]
    );
    if (rowCount === 0) return res.sendStatus(200); // duplicate delivery, already handled
    await fulfillOrder(event);
    res.sendStatus(200);

    Always verify the webhook signature first (Stripe uses the Stripe-Signature header and its SDK’s constructEvent helper), then dedupe, then do the work. And respond quickly. If fulfillment is slow, push it to a queue and acknowledge the webhook, because a slow response is exactly what triggers the provider’s retries.

    Infographic of webhook deduplication: duplicate deliveries of the same event ID are acknowledged once and skipped by a unique constraint
    Infographic 3: Webhooks arrive at least once. Verify, dedupe by event ID, then process.

    Common Idempotency Mistakes I Still See in 2026

    After a few years of adding this to client APIs, these are the mistakes that come up again and again:

    • Generating the key inside the retry loop. Every attempt gets a new key, so nothing is deduplicated.
    • Global keys instead of scoped keys. One customer can replay another customer’s response. Always scope by account or user.
    • Check-then-insert logic. It races under concurrency. Let a unique constraint or an atomic SET NX decide.
    • Caching 5xx responses forever. A temporary outage turns into a permanent failure for that key. Release the key on server errors.
    • No payload fingerprint. Reusing a key with a different body silently returns the wrong result instead of a clear 422.
    • Keys that never expire. The table grows forever. Prune keys after your retention window.
    • Forgetting downstream calls. Your API is idempotent, but the call to the payment provider is not. Pass a key there too.
    • Requiring keys on GET. Reads are already safe to repeat. Keep the header for POST and PATCH where it earns its keep.

    Where Idempotency Keys Pay Off on Client Projects

    You do not need this on every endpoint. On freelance and agency projects, these are the places where I add it without debate:

    • Payments and checkout, including subscription upgrades and refunds.
    • Order, booking, and reservation creation, where a duplicate means a real-world problem like a double-booked table.
    • Outbound emails and SMS triggered by forms, so a retry does not send the welcome email three times.
    • Lead forms that sync to a CRM, because duplicate leads make sales teams distrust the whole system.
    • Background jobs and queue consumers, which retry on failure by design.

    For a simple brochure contact form, a disabled button and server-side duplicate detection are usually enough. For anything that touches money or inventory, idempotency keys are non-negotiable for me now.

    My Idempotency Checklist Before Launch

    When I hand an API over to a client, I run through this list:

    1. Every non-idempotent endpoint that creates money, orders, bookings, or messages accepts Idempotency-Key.
    2. The client generates one key per user intent with crypto.randomUUID() and reuses it on every retry.
    3. Keys are scoped per user or API client and stored with a request fingerprint.
    4. A unique constraint or atomic SET NX guarantees one winner under concurrency.
    5. Responses return 400 for a missing key, 409 while processing, 422 for payload mismatch, and replay stored results with Idempotent-Replayed: true.
    6. Server errors release the key; stuck processing keys can be taken over after a timeout.
    7. Downstream payment calls carry their own idempotency keys.
    8. Webhook handlers verify signatures and dedupe by event ID.
    9. A scheduled job prunes keys older than the retention window.
    10. There is a test that fires the same request twice in parallel and asserts exactly one order exists.

    That last test is my favorite. It takes ten minutes to write with Promise.all and two identical requests, and it catches the check-then-insert race before a customer does.

    Final Thoughts

    Idempotency keys are not glamorous. Nobody will ever compliment your checkout for not charging them twice. But that Monday morning phone call taught me that reliability is mostly about the unglamorous paths: slow networks, impatient taps, retries you did not write yourself, and webhooks that arrive twice.

    A small table, a unique constraint, one header, and a few clear status codes are enough to turn “it worked, it just happened twice” into “it worked exactly once”. If you are building APIs for clients in 2026, add idempotency keys before launch, not after the first duplicate refund.

    If you want a second pair of eyes on your API design or checkout flow, that is exactly the kind of work I do for clients. Get in touch through darshanpanchasara.com and tell me what you are building.

  • Content Security Policy in 2026: Lock Down XSS Without Breaking Your Scripts

    Content Security Policy in 2026: Lock Down XSS Without Breaking Your Scripts

    Shield with a padlock blocking injected scripts while trusted page resources pass: Content Security Policy against XSS

    I used to treat Content Security Policy like a nice-to-have header. Ship the site, ship the features, worry about XSS “later.” Later never came — until a client staging site ate a reflected payload through a forgotten admin notice plugin and started loading a sketchy script from a domain nobody recognized. The page still looked fine. Analytics still fired. The damage window was quiet. That is when CSP stopped being theory and started being the lock on the door.

    In 2026, XSS is still the everyday web vulnerability. Frameworks got safer. Sanitizers got smarter. Attackers still win when third-party tags, CMS plugins, and “just one more analytics script” open the back door. A well-tuned CSP header will not replace secure coding — but it will turn a successful injection into a blocked request instead of a silent compromise.

    This guide is the practical path I use: mental model, report-only rollout, nonces versus hashes versus strict-dynamic, WordPress friction, Next.js middleware headers, Google Tag Manager without nuking UX, violation monitoring, and a checklist you can finish in a sprint.

    Why XSS Still Wins in 2026

    Cross-site scripting survives because modern sites are assembly kits. You own the React tree or the WordPress theme. You do not fully own the chatbot widget, the A/B testing snippet, the pixel, the CDN-hosted font CSS, or the marketing team’s “temporary” GTM container that somehow became permanent.

    XSS is not only “attacker types <script> into a comment form.” It is also:

    • A compromised npm package that ships an unexpected remote script.
    • A WordPress plugin that echoes unsanitized query params into an admin page.
    • A CDN subdomain takeover that still matches your script-src allowlist.
    • An inline event handler left behind in legacy theme code.

    Browser defaults still allow scripts from the same origin and inline scripts unless you say otherwise. Content Security Policy is how you say otherwise — loudly, in a header the browser enforces before the payload runs.

    The CSP Mental Model (Without the Fog)

    Think of CSP as a browser-side allowlist for where resources may load and how scripts may execute. You send a Content-Security-Policy response header (or a <meta http-equiv> fallback for limited cases). The browser parses directives and blocks anything that does not match.

    Core directives you will actually use:

    • default-src — fallback for other fetch directives. Start strict; open only what you need.
    • script-src — who may run JavaScript. This is the XSS battle line.
    • style-src — stylesheets and often inline styles (painful with CSS-in-JS and WP customizers).
    • img-src — images, including data URIs and CDN hosts.
    • connect-src — fetch, XHR, WebSocket, EventSource destinations.
    • frame-ancestors — who may embed your page (clickjacking defense; replaces X-Frame-Options for modern browsers).
    • upgrade-insecure-requests — rewrite http subresources to https when possible.
    • base-uri and form-action — stop sneaky base tag and form hijacks.
    • object-src 'none' — kill plugins/Flash leftovers; almost always set this.

    A starter policy that looks serious but is still tunable:

    Content-Security-Policy:
      default-src 'self';
      script-src 'self';
      style-src 'self' 'unsafe-inline';
      img-src 'self' data: https:;
      font-src 'self' data:;
      connect-src 'self';
      frame-ancestors 'self';
      base-uri 'self';
      form-action 'self';
      object-src 'none';
      upgrade-insecure-requests;

    Notice style-src still allows 'unsafe-inline'. That is a common compromise while you migrate. For XSS, script-src is the directive that matters most — do not casually add 'unsafe-inline' or 'unsafe-eval' there just to silence console noise.

    Layered CSP directives as stacked shields: default-src base, script-src front line, and frame-ancestors outer ring
    CSP layers: default base, script front line, frame-ancestors lock.

    Report-Only First: Roll Out Without Breaking Production

    Never flip a strict CSP on a live marketing site on Friday afternoon. Use Content-Security-Policy-Report-Only first. The browser still evaluates the policy and sends violation reports, but it does not block resources. You learn what would break before users feel it.

    Content-Security-Policy-Report-Only:
      default-src 'self';
      script-src 'self' 'nonce-{RANDOM}';
      report-to csp-endpoint;
      report-uri https://example.com/csp-report;

    Two reporting mechanisms exist. report-uri is the older directive browsers still support widely. report-to (paired with a Reporting-Endpoints or legacy Report-To header) is the newer Reporting API path. In 2026 I ship both during transition so older and newer browsers both phone home.

    My rollout pattern:

    1. Inventory every script, style, font, iframe, and API host (DevTools Network + a crawl of key templates).
    2. Deploy Report-Only with a tight script-src.
    3. Collect 3–7 days of violation reports from real traffic.
    4. Fix legitimate gaps (add hosts, switch to nonces) or remove dead third parties.
    5. Switch the same policy to enforcing Content-Security-Policy.
    6. Keep Report-Only as a canary for the next tightening pass.

    Cloudflare, many CDNs, and reverse proxies can inject CSP headers at the edge. That is useful when you cannot touch every origin app — but keep one source of truth. Duplicate headers from app + edge often merge into a messier effective policy than you expect.

    Nonces vs Hashes vs strict-dynamic

    Allowlisting entire CDNs with script-src https://cdn.example.com is fragile. If that CDN hosts anything, an XSS that injects a script tag pointing at a known-good host can still run. Nonces and hashes move trust from “this domain” to “this exact script instance.”

    Nonces

    A nonce is a cryptographically random per-response value. You put it on the CSP header and on every legitimate inline <script> tag:

    Content-Security-Policy: script-src 'nonce-r4nd0mValueHere';
    
    <script nonce="r4nd0mValueHere">
      // bootstrap
    </script>

    Attacker-injected inline scripts lack the nonce and fail. Generate a fresh nonce every response — never reuse a static string in config. Frameworks and middleware that can inject attributes into the HTML stream make this workable; naive static HTML hosts struggle.

    Hashes

    For fixed inline snippets (a tiny bootloader, a JSON-LD block if you insist on inline), compute a SHA-256 of the exact script body and allow 'sha256-...' in script-src. Change one character and the hash breaks — which is the point. Hashes are great for stable snippets and painful for frequently changing inline JS.

    strict-dynamic

    'strict-dynamic' (CSP Level 3) says: scripts that were allowed by nonce or hash may load additional scripts, and host allowlists are ignored for script loading in supporting browsers. That unlocks modern bundlers and tag managers that inject child scripts — without opening every CDN on earth.

    script-src 'nonce-{RANDOM}' 'strict-dynamic' 'unsafe-inline' https: http:;

    The 'unsafe-inline' and host tokens look scary, but browsers that understand strict-dynamic ignore those fallback tokens. Older browsers fall back to the allowlist path. That dual behavior is intentional backward compatibility, not a bug — document it for your team so nobody “cleans up” the policy and breaks Safari edge cases.

    Three ways CSP trusts scripts: nonce key, SHA-256 hash fingerprint, and strict-dynamic script chain
    Nonce, hash, and strict-dynamic — three ways to authorize scripts.

    WordPress CSP: Plugin and Theme Friction

    WordPress is where CSP idealism meets plugin soup. Themes print inline styles. Page builders inject inline scripts. WooCommerce, forms plugins, and “optimization” tools rewrite markup. A nonce-based CSP that works on a blank Twenty Twenty-Five child theme can shatter the moment Elementor or a popup plugin loads.

    Practical WordPress CSP tactics I use:

    • Prefer sending CSP from the host/CDN (Cloudflare Transform Rules, nginx add_header, LiteSpeed) so PHP plugins cannot casually override it — unless you need per-page nonces, which then must be generated in PHP and injected into both header and markup.
    • Audit wp_enqueue_script usage. Move inline wp_add_inline_script blocks behind nonces if your mu-plugin can filter script tags.
    • Expect style-src 'unsafe-inline' longer than you want. Many customizers and block editor front-end styles still assume inline CSS.
    • Block object-src 'none' and tighten frame-ancestors early — low breakage, high win.
    • Watch admin separately. A public CSP that breaks /wp-admin makes editors revolt. Often you need a looser policy (or none) on admin routes.

    Security plugins that “add CSP” with a GUI checkbox are fine for first drafts. Treat their output as Report-Only candidates, then harden. Blindly enabling “strict” in a plugin without reading the generated header is how you brick checkout on Black Friday.

    Next.js and Middleware Headers

    Next.js apps fit CSP well because you control the response pipeline. In the App Router era, middleware or next.config headers are the usual place to attach policy. For nonces, middleware is the cleanest: generate a nonce, set it on the CSP header, and expose it to Server Components / the document so script tags can read the same value.

    // Conceptual middleware sketch
    import { NextResponse } from 'next/server';
    
    export function middleware(request) {
      const nonce = Buffer.from(crypto.randomUUID()).toString('base64');
      const csp = [
        "default-src 'self'",
        `script-src 'self' 'nonce-${nonce}' 'strict-dynamic'`,
        "style-src 'self' 'unsafe-inline'",
        "img-src 'self' data: https:",
        "connect-src 'self' https://api.example.com",
        "frame-ancestors 'none'",
        "object-src 'none'",
        "base-uri 'self'",
      ].join('; ');
    
      const response = NextResponse.next();
      response.headers.set('Content-Security-Policy', csp);
      response.headers.set('x-nonce', nonce); // read downstream carefully
      return response;
    }

    Wire the nonce into your root layout scripts. Avoid shipping a static CSP string in next.config.js alone if you need per-request nonces — static config cannot rotate them. Also remember preview deployments, Storybook, and third-party auth popups: each environment may need its own connect-src and frame-src carve-outs documented in env-specific config, not tribal knowledge.

    Google Tag Manager and Third-Party Scripts Without Nuking UX

    GTM is the usual CSP villain. Marketing needs tags. Security needs boundaries. You have three honest options:

    1. Nonce + strict-dynamic — bootstrap GTM with a nonce; let it load children under strict-dynamic. Still review what the container publishes.
    2. Server-side tagging — move collection to a first-party endpoint you control; shrink browser-side third parties. More work, cleaner CSP.
    3. Allowlist specific hosts — brittle, but sometimes required for older stacks. Prefer the smallest host set, not *.google.com forever.

    Also budget for:

    • Analytics beacons in connect-src and sometimes img-src.
    • YouTube/Vimeo embeds in frame-src.
    • Payment iframes with explicit origins.
    • Font CDNs in font-src — or better, self-host fonts and delete the third-party hop.

    Every third-party script is a trust decision. CSP makes that decision visible. When a stakeholder asks why a new heatmaps vendor “does not work,” show the violation report instead of arguing vibes.

    Funnel turning CSP Report-Only violation alerts into an enforced Content Security Policy gate
    Report-Only funnel into an enforcing CSP gate.

    Monitoring Violations Like a Product Metric

    A CSP you never read is theater. Wire reports to something searchable: your own endpoint, Cloudflare logging, a SIEM, or a dedicated CSP SaaS. Sample if volume is high, but do not discard admin or checkout paths — those are where silent breakage hurts revenue.

    When a report arrives, ask:

    • Is this a real user browser hitting a legitimate feature we forgot?
    • Is this an extension injecting scripts (common false positive)?
    • Is this an actual XSS attempt worth escalating?
    • Did a deploy change hashes or remove a nonce attribute?

    Browser extensions generate a surprising amount of noise. Filter by blocked-uri, document-uri, and user-agent patterns before you widen script-src “just to quiet Slack.”

    Trusted Types: The Next Layer After CSP

    CSP stops many script injections. DOM XSS via innerHTML, eval-like sinks, and sticky legacy APIs still happens inside allowed scripts. Trusted Types (enforced with require-trusted-types-for 'script' and trusted-types ...) make dangerous sinks reject raw strings unless they pass through a policy you define.

    In 2026, Trusted Types are worth piloting on high-value apps once your CSP is stable. Do not bolt them on the same week you first meet Report-Only — sequence matters. CSP first, then Trusted Types on the hottest sinks.

    Common Breakages and Fixes

    • Blank pages / hydration failures — inline bootstrap scripts missing nonces. Fix attributes or move logic to external files covered by 'self'.
    • Styles look broken — inline style attributes blocked. Prefer classes; temporarily keep style-src 'unsafe-inline' while you migrate.
    • Fonts missing — add the font host or self-host and point font-src 'self'.
    • API calls failing — expand connect-src for your API and auth issuer.
    • Embedded videos gone — set frame-src for the player origin.
    • Admin / preview broken — scope CSP by path; do not force the public policy onto every route.
    • GTM “half working” — child scripts blocked without strict-dynamic or missing hosts.
    • Mixed content remnants — add upgrade-insecure-requests and fix hard-coded http URLs.

    A Practical CSP Checklist

    • Inventory scripts, styles, frames, fonts, and API hosts on key templates.
    • Ship Content-Security-Policy-Report-Only with object-src 'none', tight base-uri, and a realistic script-src.
    • Add report-uri and report-to; verify reports arrive.
    • Introduce per-request nonces (or hashes for fixed snippets); prefer 'strict-dynamic' where supported.
    • Carve out WordPress admin / preview / Storybook if needed.
    • Decide GTM strategy: nonce bootstrap, server-side tagging, or minimal host allowlist.
    • Flip to enforcing CSP after a quiet report week.
    • Document the policy in the repo next to header config — not only in a Notion page.
    • Schedule a quarterly tighten: remove unused hosts, kill leftover 'unsafe-eval'.
    • Pilot Trusted Types after CSP is boringly stable.

    Closing

    Content Security Policy will not make insecure code secure. It will make successful XSS much harder to turn into a lasting foothold — especially when third-party scripts and CMS plugins expand your attack surface every quarter.

    Start in Report-Only. Earn the right to enforce. Prefer nonces and strict-dynamic over eternal CDN allowlists. Treat WordPress and GTM as first-class design constraints, not afterthoughts. Monitor violations like uptime. That is how you lock down XSS in 2026 without breaking the scripts your product actually needs.